# Introduction
This guide demonstrates how to quickly setup the EVM and the experience out-of-box
audio demos on the AM62D Audio evaluation module (EVM). This can be done
from any PC platform (Windows or Linux).
# Hardware Setup
In addition to the AM62D EVM itself, the following hardware is needed:
* USB Type-C 20W power supply ( Make sure to use type-C to type-C cable ).
* USB Micro-B cable for UART serial communication
* Any audio device with input microphone, output speaker and 3.5mm audio jack (Needed for running MCASP examples)
* Note : Apple earphones are not supported.
* Micro-SD card (8GB or larger recommended)
* Ethernet cable for tuning interface
* Note : The ethernet expansion board needs to be attached separately

[[b! USB Type-C Ports
There are 2 USB Type-C ports on the EVM. The one next to the USB Micro-B port is marked as
"Type-C DRP" and can be used for data communication and power supply. The other one is marked
as "Type-C PWR" and is only used for power supply.
]]
# Host PC Requirements
* Windows PC
* Windows 10 64 bit
* Minimum 4GB, >8GB RAM recommended
* At least 10GB of hard disk space
* Linux PC
* Ubuntu 22.04 64bit or higher
* Minimum 4GB, >8GB RAM recommended
* At least 10GB of hard disk space
# Audio-SDK Setup
This section walks through the steps needed to run the prebuilt binaries on the AM62D EVM and connecting it to Audio
Weaver
## Format SD card
### Windows Platform
* Start `diskpart` in run-box
* Type `list disk` and then press Enter.
* Type `select disk [n]` and press Enter. n - represents the disk number of your bootable SD card
* Type `clean` and then press Enter
* Type `create partition primary` and then press Enter.
* Type `format fs=fat32 quick` and then press Enter to format SD card.
* Type `list volume` and then press Enter.
* Type `select volume [n]` and press Enter. n - represents the primary partition number you created.
* Type `active` and then press enter. ( This will enable the bootable flag for this partition )
* Type `exit` and then press Enter.
### Linux Platform
* Connect the micro SD card to the PC using any card reader
* Check if it's detected by either using the sudo dmesg command or the `lsblk` command
* Unmount any mounted partitions using the `umount` command
* Launch the fdisk utitility. `sudo fdisk [/dev/mmcblk0]`
* Delete all the existing partitions using fdisk utility, option `d`
* Create new partition using option `n`
* Make the first partition as bootable by setting the BOOT flag, option `a`
* Format the first partition with FAT32, option t. Hex code or alias (type L to list all): `c`
* Write all the changes
## Flash Prebuilt Binaries to SD card
The <a href="https://www.ti.com/secureresources/AM62D-RESTRICTED-SW" target="blank">release</a>
provides prebuilt binaries which have been tested in SD boot mode.
* The prebuilt binaries are located at: `sdk_install_loc/bin/am62dx/sd_card`
* Format the micro-sd card in FAT filesystem. Refer Format bootable SD card section.
* Copy the below mentioned prebuilt binaries to the micro-sd card.
* `tiboot3.bin` : SD Card bootloader
* `dm` : System firmware which runs on Wakeup R5F
* `app` : Tuning gateway application which runs on MCU/R5F
* `app_dsp` : The DSP application which runs on C7x and includes AWECore
## Establishing a Serial Connection with the EVM
Use a USB Micro-B cable to connect the host PC to the USB Micro-B interface for UART on the EVM.
Open a serial port console on the host PC, according to procedures described below for
Linux or Windows. When the serial console opens, it will be blank until the EVM powers up.
### Connecting with Linux
1. Determine the serial device names associated with the EVM by running the following command on the Linux PC:<br>
```
dmesg | grep ttyUSB
```
<br>You should see results similar to this:
```
[ 8383.599799] usb 2-1.3: FTDI USB Serial Device converter now attached to ttyUSB0
[ 8383.600472] usb 2-1.3: FTDI USB Serial Device converter now attached to ttyUSB1
[ 8383.600884] usb 2-1.3: FTDI USB Serial Device converter now attached to ttyUSB2
[ 8383.601265] usb 2-1.3: FTDI USB Serial Device converter now attached to ttyUSB3
```
<br>This means the EVM has four serial ports. The second one is to be used for boot logs.
2. Use the following command to open a serial port console<br>
```
screen /dev/ttyUSB1 115200
```
### Connecting with Windows
1. Open Windows Device Manager and it should show 4 COM ports associated with the EVM, similar to below:<br>
<img src="./images/am62dx/COM_ports.png" alt="COM Ports" style="width:80%; height:auto;">
2. Use a serial terminal emulator such as TeraTerm to connect to the first port.
Connect to the **second COM port** to view the boot logs.
Configure the serial port setting to 115200 baud rate, 8 bit, no parity, 1 stop bit, no flow control, as shown below:
<img src="./images/am62dx/Tera_term.png" alt="TeraTerm" style="width:60%; height:auto;">
## Run Audio-SDK on the EVM <span id="SD_boot"></span>
* Insert the flashed SD card in EVM SD-CARD slot. Refer Flash Prebuilt Binaries to SD card section for flashing the
prebuilt binaries.
* Set the board in SD boot mode and powercycle the board <br>
BOOTMODE [ 8 : 15 ] (SW1) = 0100 0000 <br>
BOOTMODE [ 0 : 7 ] (SW2) = 1100 0010

* Connect Terminal using UART port (second of 4 ports).
Refer <a
href="http://swubn04.india.englab.ti.com/mcu_plus_sdk/sitmpurtos_nightly_mcu_plus_sdk_am62dx/latest/artifacts/output/webgen/exports/docs/api_guide_am62dx/EVM_SETUP_PAGE.html#CCS_UART_TERMINAL">
Setup UART Terminal page
</a> for details.
* After power cycle, the console will print ip-address. Use the ip-address for AWEServer/AWEDesigner. The console output should like below. <span id="boot_logs"></span>

## Steps to run AWE application <span id="AWE_connection"></span>
* Open UART console and check for ip-address as shown in the above figure.
* On Windows computer, launch
<a href="https://21088554.fs1.hubspotusercontent-na1.net/hubfs/21088554/AWE_Designer_8.D.2.6_Standard.exe" target="blank">
AWE Server
</a>.
* Connect using TCP/IP with IP address given by DHCP server <br>
Click on Target -> Change Connection -> Enter IP address
* Connect AWE server to AM62D <br>
<img src="./images/am62dx/AWE_connect_ethernet.png" alt="AWE_connect_ethernet" style="width:60%; height:auto;">
* Click on **connect** checkbox if it does not connect automatically
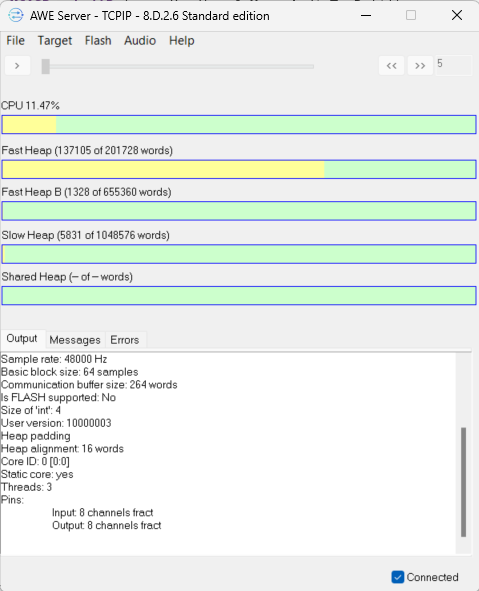
* Now launch Awe Designer and open the layout file and press 'Launch icon'.
* You should now be able to see your application running. It should look something like the below fig.
# Next Steps
* Complete the MCU+SDK Getting Started Guide
* Run sample examples on AM62D
* Review Developer guides for AM62D
* Subscribe to MCU+SDK release notifications
* Browse MCU+SDK resources on TI Resource Explorer
# Troubleshooting
Here we list some common problems which may happen during this exercise and the corresponding solutions:
1. **The EVM doesn't power up and no LEDs are illuminated after connecting the USB-C power cable.**<br>
This is usually caused by not having the right power supply. Please make sure a USB-C power adapter
is used. A USB to USB-C cable will not work.
Please refer to the <a href="#hardware-setup">AM62D Audio EVM User's Guide</a> for recommended external power
supply</a>.
2. **The EVM is connected to the PC, but the PC doesn't recognize the device.**<br>
This may be caused by connecting to the wrong port on the EVM. Please make sure you connect to the
USB Micro-B connector right next to the two USB-C connectors. Please refer to <a href="#hardware-setup">Hardware
Setup</a>.
3. **EVM fails to boot**<br><span id="EVM_lights"></span>
Make sure the EVM is set to SD boot mode.<br>
Ensure the marked LEDs are glowing as shown in the below image.

4. **AWE server fails to connect**<br>
Make sure that the following requirements are satisfied.
* The <a href="#EVM_lights">marked LEDs</a> are glowing.
* EVM is set to <a href="#SD_boot">SD boot mode</a>.
* The ethernet cable is connected to the EVM.
* The boot logs should be similar to <a href="#boot_logs">this</a>.
* The DM logs(3rd COM port of the 4 ports) should look like the below fig.

* The fields in <a href="#AWE_connection">AWE target connection</a> is configured correctly.
* Verify that the SBL, R5 app, and C7x app are executing correctly by opening their corresponding terminals.
If you encounter any other issues not listed above, you can get help from the
[E2E Processor Forum](https://e2e.ti.com/support/processors-group/processors/f/processors-forum).
It is recommended to first search the forum for similar questions and relevant answers.
If you cannot find any related questions, please ask a new question and provide as much information
as possible such as SDK version, detailed description of the problems, boot log if applicable, etc.
<div align="center" style="margin-top: 4em; font-size: smaller;">
<a rel="license" href="https://creativecommons.org/licenses/by-nc-nd/4.0/"><img alt="Creative Commons License"
style="border-width:0" src="./web_support/cc_license_icon.png" /></a><br />This work is licensed under a <a
rel="license" href="https://creativecommons.org/licenses/by-nc-nd/4.0/">Creative Commons
Attribution-NonCommercial-NoDerivatives 4.0 International License</a>.
</div>