# Introduction
This guide demonstrates how to quickly start Linux on the AM62Lx EVM and run
the out-of-box demos. This can be done from any PC platform (Windows, Linux or macOS).
Please refer to [AM62Lx Evaluation Module](https://www.ti.com/tool/TMDSAM62LEVM)
for detailed information about the EVM.
# Hardware Setup
In addition to the EVM itself, the following hardware is needed:
* USB Type-C 5~15V/3A power supply
* Micro-SD card reader
* Micro-SD card (16GB or larger recommended)
* USB Micro-B cable for UART serial communication
* HDMI display and HDMI cable (for running out-of-box demos from an HDMI display)
* USB mouse (for running out-of-box demos from an HDMI display)
* Ethernet cable (for running out-of-box demos from a web browser)
The figure below shows the basic hardware setup:

[[b! USB Type-C Ports
There are 2 USB Type-C ports on the EVM. The one closer to the HDMI connector is
marked as "Type-C PWR" and is only used for power supply. The other one is marked
as "Type-C DRP" and can be used for data communication and power supply.
]]
[[b! Push Buttons
There are 3 push buttons on the EVM. The one marked as "SW6 PORz" is used for Power
on Reset. The one marked as "SW7 RST" is used for warm reset. The other one marked as
"SW5 INT" is used to generate interrupt on GPIO0_90 pin.
]]
The simplest way to run Linux on the EVM is through an SD card. For that, the EVM will need to be
configured for SD card boot. Refer to [AM62Lx EVM User's Guide](https://www.ti.com/tool/TMDSAM62LEVM) or for
detailed information about boot mode configurations. For quick reference, the figure below shows the
boot mode switch setting for SD card boot.
[[b! Boot Mode Switches
Please ensure the EVM is powered off when changing the boot mode switches.
]]

# Software Setup
To boot Linux through an SD card, a Linux bootable SD card needs to be created. For that,
a Linux WIC image and an image writing utility are needed.
### Getting the Linux WIC Image
Go to [Processor-SDK download page](https://www.ti.com/tool/PROCESSOR-SDK-AM62L). Click "Downloads" and
then choose either PROCESSOR-SDK-LINUX-AM62L or PROCESSOR-SDK-LINUX-RT-AM62L. Click "Download options"
and then in the pop-up window download the WIC image tisdk-default-image-am62lxx-evm-<version>-rootfs.wic.xz.
### Writing the WIC Image to SD Card
An image writing utility is needed to write the WIC image to an SD card. An open source project,
[balenaEtcher](https://www.balena.io/etcher/), is recommended for this purpose, which works with
Windows, macOS and Linux.
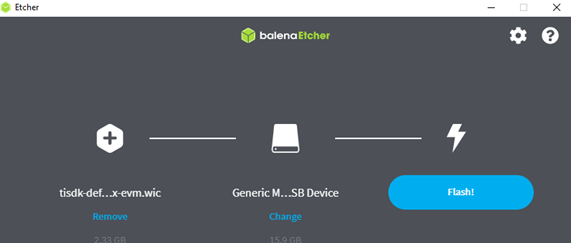
After balenaEtcher is installed, insert a micro SD card into the SD card reader and start Etcher.
Choose the compressed WIC image obtained in previous step, choose the SD card reader as the
target, and then click "Flash". Etcher will decompress the image and write it to the SD card,
as shown below.
# Establishing a Serial Connection with the EVM
Use a USB Micro-B cable to connect the host PC to the USB Micro-B interface on the EVM, which is marked as "J7 UART".
Open a serial port console on the host PC, according to procedures described below
for Linux, Windows or macOS. When the serial console opens, it will be blank until the EVM powers up.
### Connecting with Linux
1. Determine the serial device names associated with the EVM by running the following command on the Linux PC:
```
dmesg | grep ttyUSB
```
You should see results similar to this:
```
[ 8383.599799] usb 2-1.3: FTDI USB Serial Device converter now attached to ttyUSB0
[ 8383.600472] usb 2-1.3: FTDI USB Serial Device converter now attached to ttyUSB1
[ 8383.600884] usb 2-1.3: FTDI USB Serial Device converter now attached to ttyUSB2
[ 8383.601265] usb 2-1.3: FTDI USB Serial Device converter now attached to ttyUSB3
```
This means the EVM has four serial ports. The first one is to be used for serial communication.
2. Use the following command to open a serial port console:
```
screen /dev/ttyUSB0 115200
```
### Connecting with Windows
1. Open Windows Device Manager and it should show 4 COM ports associated with the EVM, similar to below:
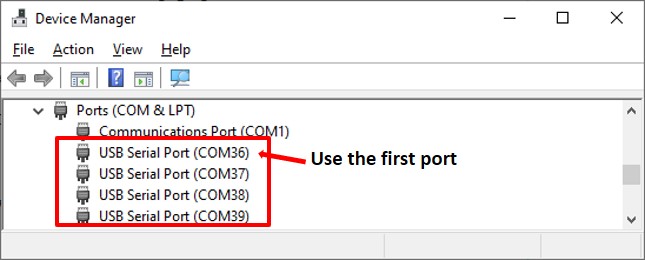
2. Use a serial terminal emulator such as TeraTerm to connect to the first port. Configure the
serial port setting to 115200 baud rate, 8 bit, no parity, 1 stop bit, no flow control, as shown below:

### Connecting with MacOS
1. Determine the serial device names associated with the EVM by running the following command:
```
ls /dev/cu*
```
You should see the USB ports listed, similar to below:
```
/dev/cu.usbserial-502111400330
/dev/cu.usbserial-502111400331
/dev/cu.usbserial-502111400332
/dev/cu.usbserial-502111400333
```
This means the EVM has four serial ports. The first one is to be used for serial communication.
3. Use the following command to open a serial port console:
```
screen /dev/cu.usbserial-502111400330 115200
```
# Running Linux and Demos on the EVM
### Booting Linux
Assuming you have flashed a Micro-SD card with the EVM Linux image and connected to the EVM's serial
port to your host PC, you can boot the EVM to Linux now:
1. Insert the Micro-SD card to the EVM (the side of the card with contacts should face downward).
2. Make sure the EVM boot mode switches are set properly for SD card boot as described earlier.
3. (Optional) Connect the EVM to a router/switch through an Ethernet cable.
4. (Optional) Connect the EVM to an HDMI display through an HDMI cable.
5. Connect one end of the USB-C cable to the EVM and plug in the other end to the power adapter.
6. The EVM should boot and the booting progress should display in the serial console output. At the end
of booting, the Arago login prompt will appear. Just enter "root" to log in, as shown below:
```
NOTE: If the package is a dependency of another package you
will be notified of the dependent packages. You should
use the --force-removal-of-dependent-packages option to
also remove the dependent packages as well
***************************************************************
***************************************************************
am62lxx-evm login: root
root@am62lxx-evm:~#
```
You are in Linux on your AM62Lx EVM now and can proceed to run the out-of-the-box demos next.
### Running the HMI Demo
If an HDMI display is connected to the EVM, the HMI demo will appear on the HDMI display after the EVM
boots to Linux, as shown below. If you connected the HDMI display after the EVM boots to Linux, you'll
need to reboot the EVM to bring up the HMI demo on the HDMI display.
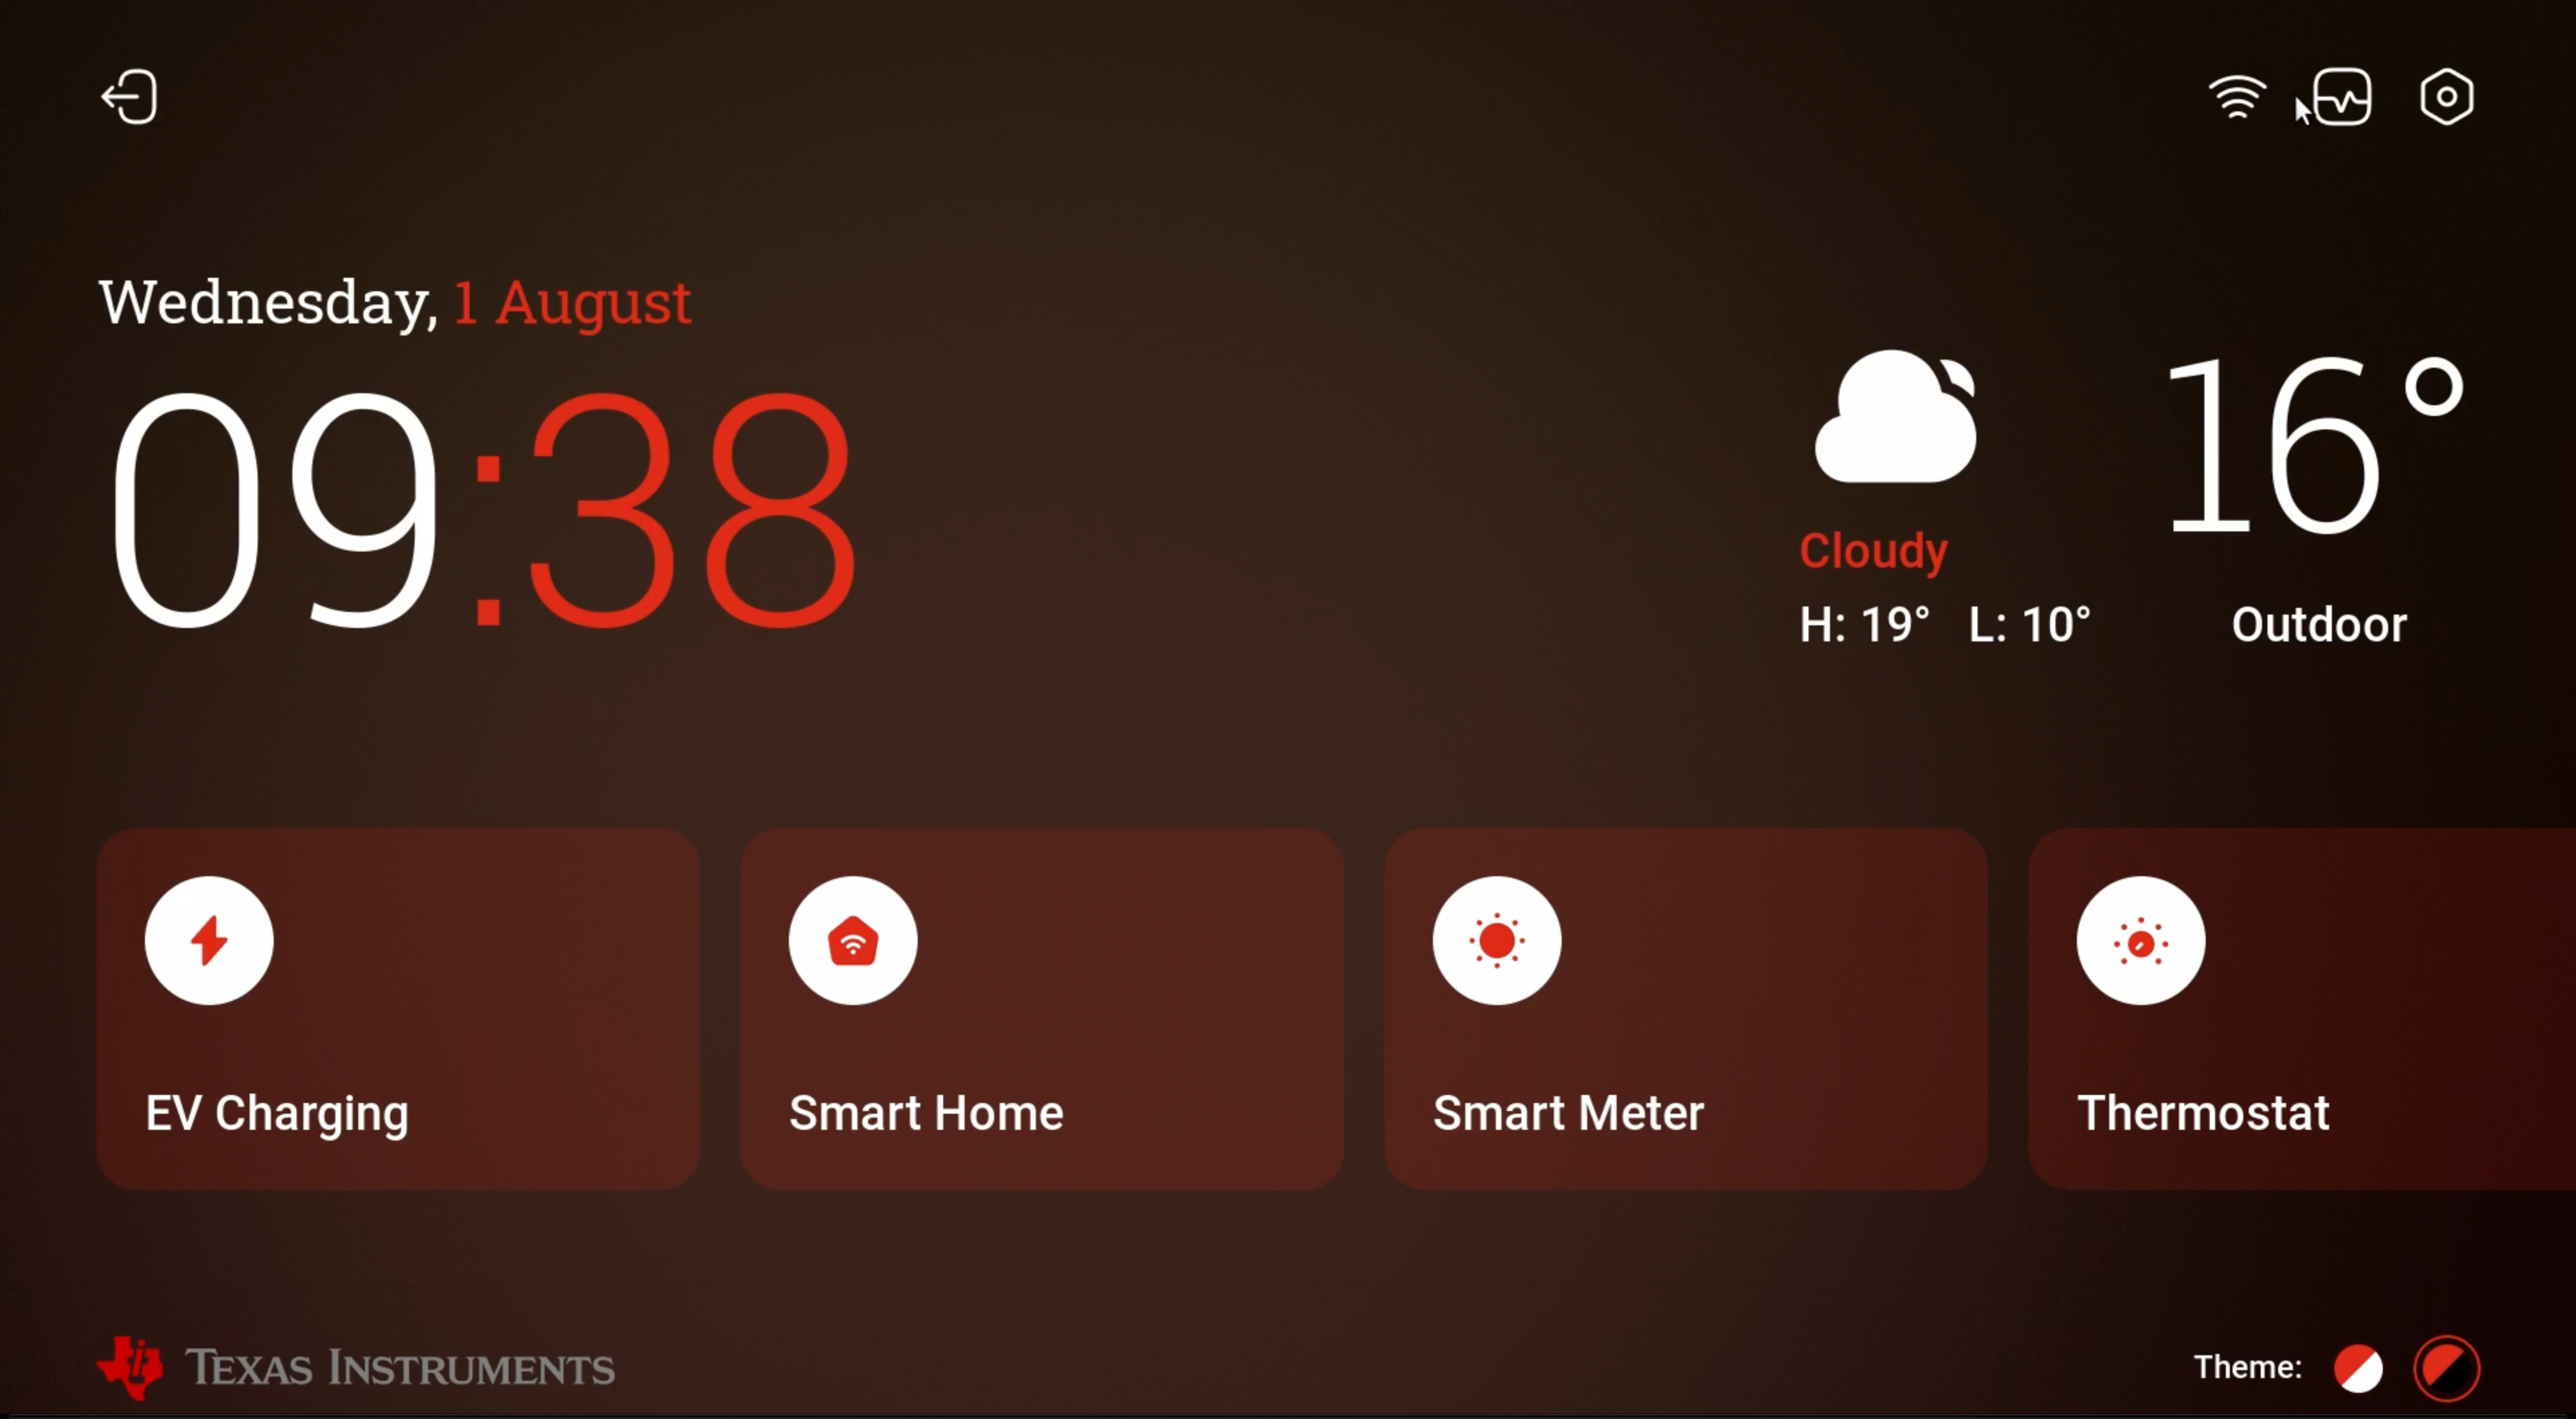
For more details on this demo, please visit [TI LVGL Demo User Guide](https://software-dl.ti.com/processor-sdk-linux/esd/AM62LX/latest/exports/docs/system/Demo_User_Guides/TI_LVGL_Demo_User_Guide.html)
# Next Steps
After booting the EVM to Linux and running out-of-box demos, users are encouraged to explore
more through the <a href="javascript:void(0)" onclick="window.parent.jumpToTirexNode('AO2IbV53aUarnRvmyK9fxQ__XaWts8R__LATEST')">AM62Lx Academy</a>.
# Troubleshooting
Here we list some common problems which may happen during this exercise and the corresponding solutions:
1. **The EVM doesn't power up and no LEDs are illuminated after connecting the USB-C power cable.**
This is usually caused by not having the right power supply. Please make sure a USB-C power adapter
is used. A USB to USB-C cable will not work.
Please refer to the [AM62Lx EVM User's Guide](https://www.ti.com/lit/pdf/sprujg8) for recommended external power supply</a>.
2. **The EVM is connected to the PC, but the PC doesn't recognize the device.**
This may be caused by connecting to the wrong port on the EVM. Please make sure you connect to the
USB Micro-B connector J7. Please refer to <a href="#hardware-setup">Hardware Setup</a>.
3. **The EVM doesn't boot and the serial console doesn't display anything.**
First, make sure the Micro-SD card is flashed with the right WIC image.
Please refer to <a href="#software-setup">Software Setup</a>.
Then double check the EVM boot mode setting and it must be configured for SD card boot.
Please refer to <a href="#hardware-setup">Hardware Setup</a>.
If you encounter any other issues not listed above, you can get help from the
[E2E Processor Forum](https://e2e.ti.com/support/processors-group/processors/f/processors-forum).
It is recommended to first search the forum for similar questions and relevant answers.
If you cannot find any related questions, please ask a new question and provide as much information
as possible such as SDK version, detailed description of the problems, boot log if applicable, etc.
<div align="center" style="margin-top: 4em; font-size: smaller;">
<a rel="license" href="https://creativecommons.org/licenses/by-nc-nd/4.0/"><img alt="Creative Commons License" style="border-width:0" src="./web_support/cc_license_icon.png" /></a><br />This work is licensed under a <a rel="license" href="https://creativecommons.org/licenses/by-nc-nd/4.0/">Creative Commons Attribution-NonCommercial-NoDerivatives 4.0 International License</a>.</div>