Introduction
This guide will walk you through:
- Downloading and installing Code Composer Studio (CCS)
- Configuring CCS for the xWRL684x processor
- Creating target configurations
- Building examples using CCS
- Loading and running applications via CCS
Downloading and Installing CCS
Step 1: Download CCS
- Go to the CCS download home page
- Download CCS 20.1.0
- Extract the downloaded package to a location on your computer
Step 2: Install CCS
- Launch the installer by double-clicking the extracted installer file
- Follow the installation wizard
- Installation Directory: We recommend using the default installation path
- Setup Type: Select "Custom" installation type
- Component Selection: Make sure to select "mmwave" components to install xWRL684x related emulation and GELs
- Complete the installation process
- Launch CCS and select a workspace (the default is recommended)
- You can check "Use this as default and do not ask again" if desired
Verifying Component Installation
To ensure all necessary components are correctly installed and detected by CCS:
Step 1: Check SysConfig Installation
- In CCS, go to File > Preferences > Code Composer Studio Settings
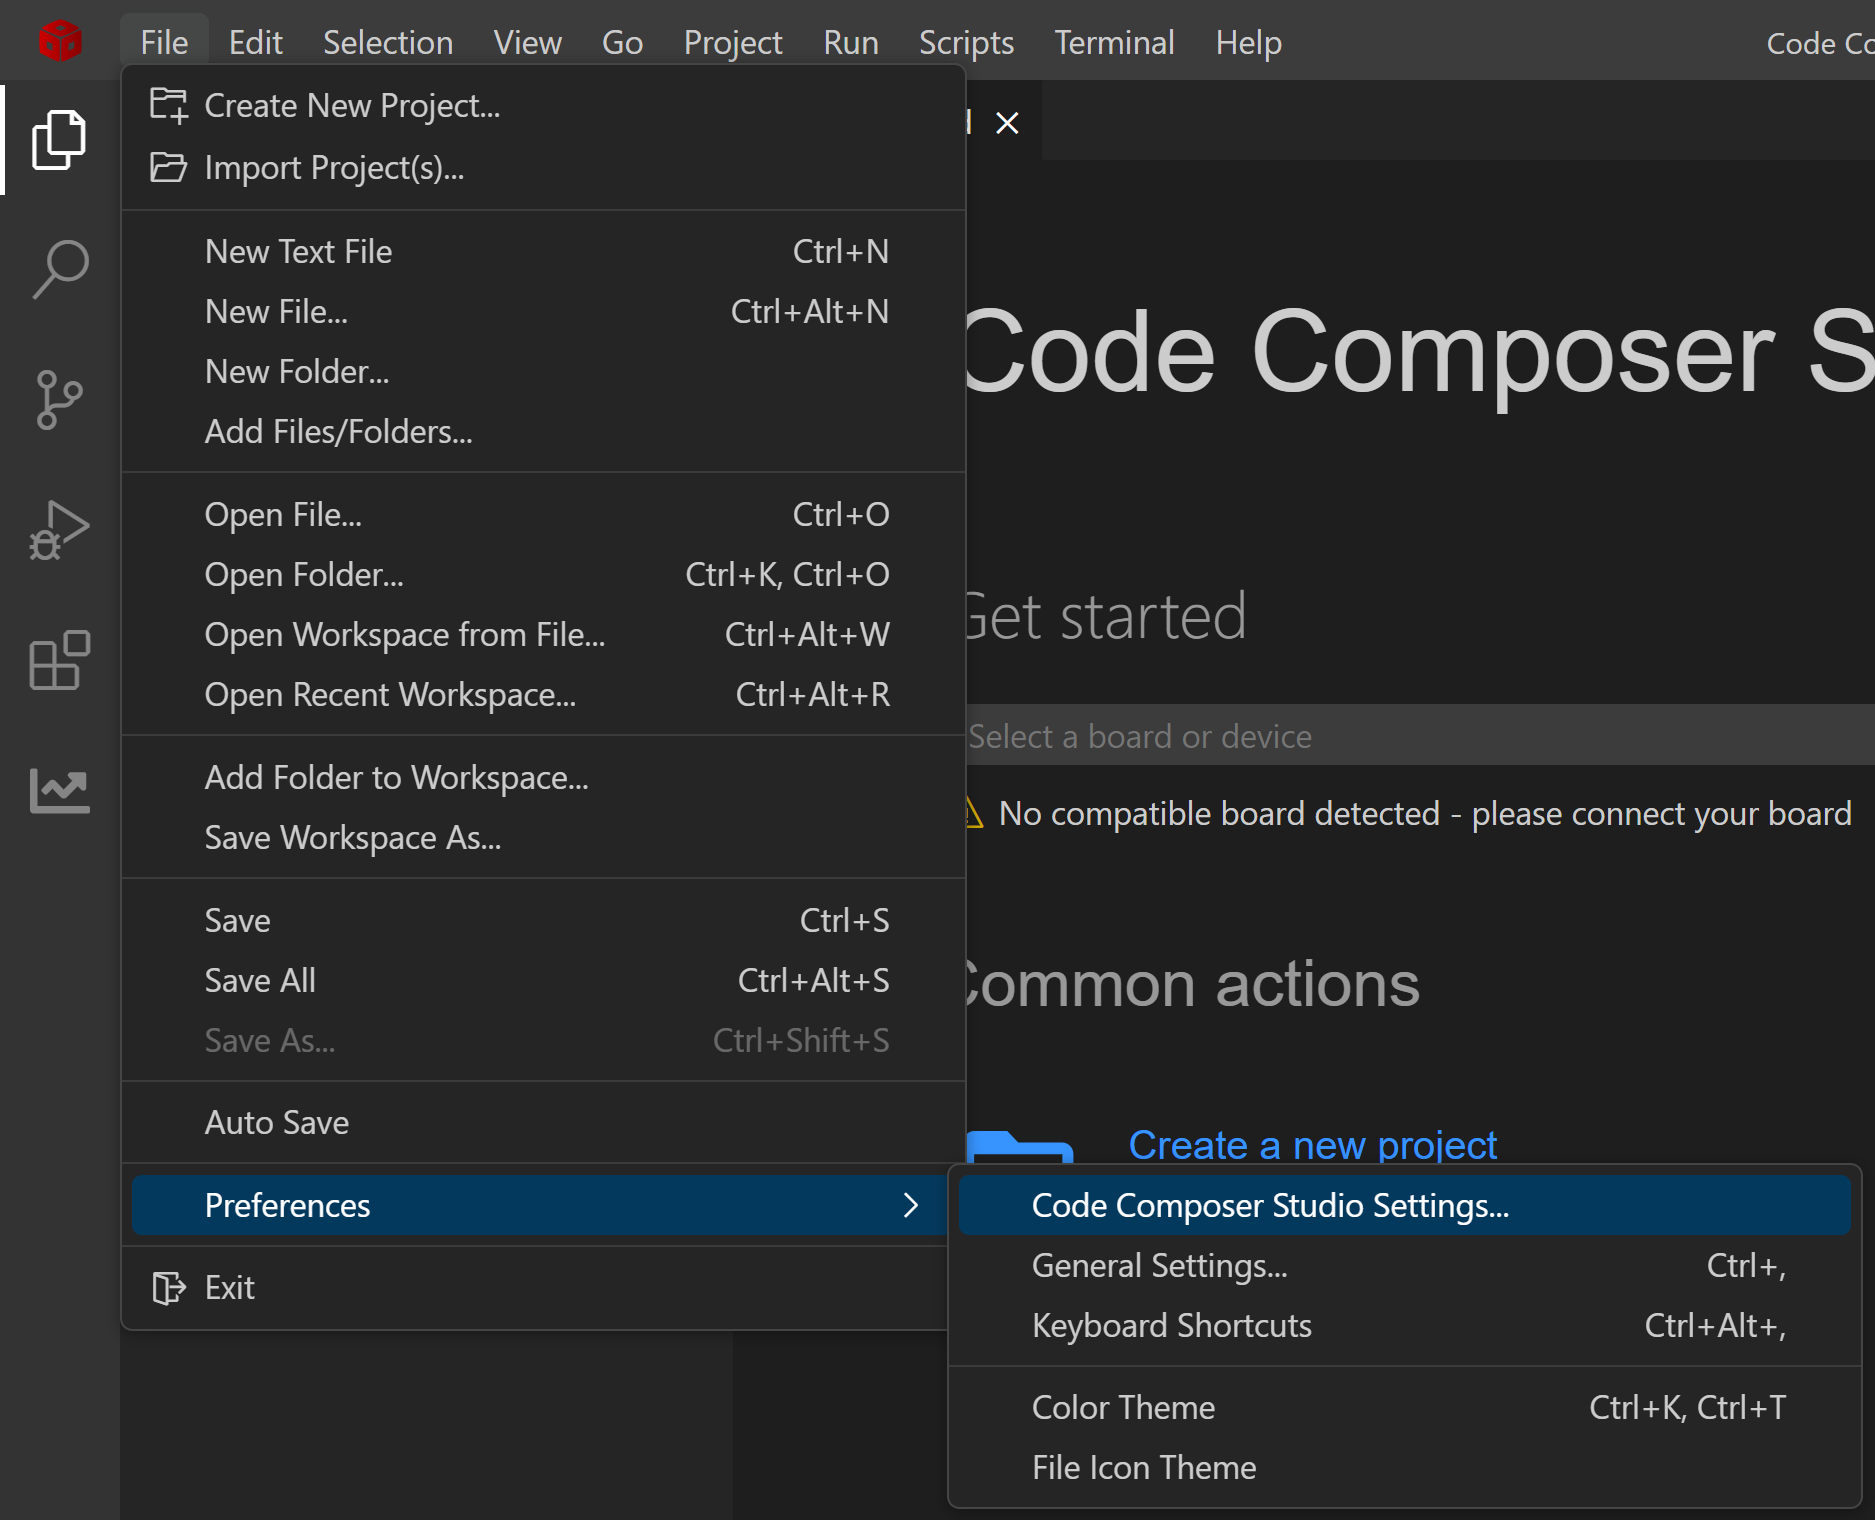
CCS Preferences
- Navigate to General > Products
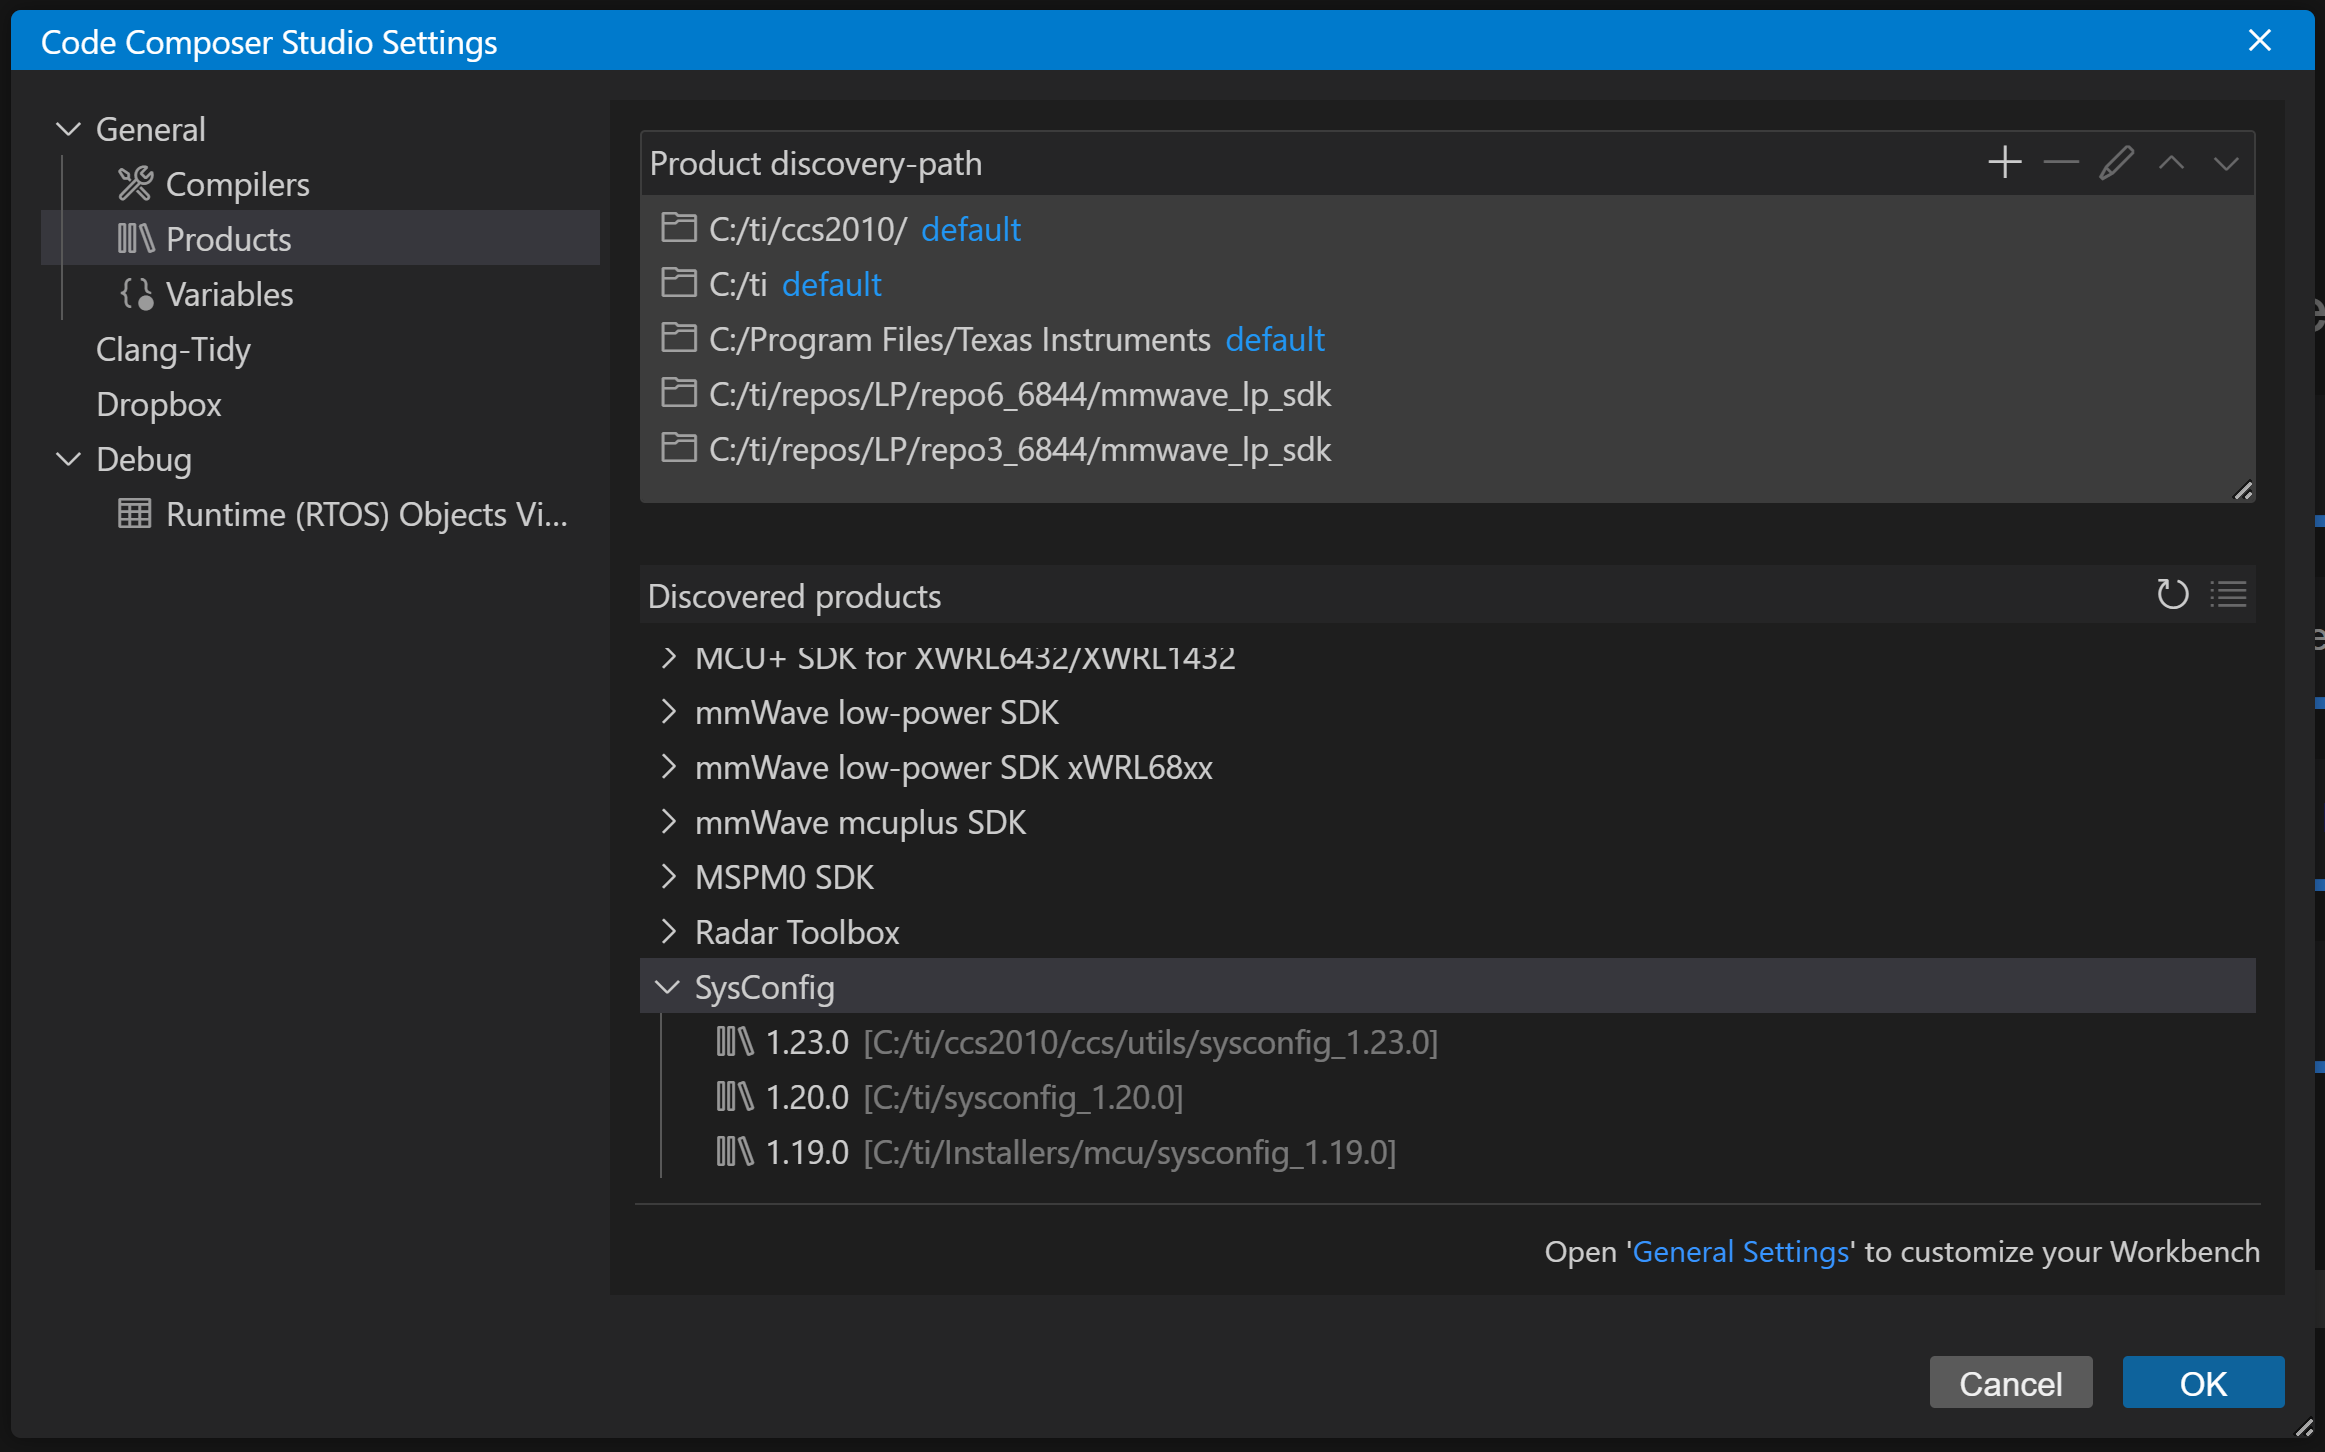
CCS Products
- Verify that SysConfig 1.23.0 is listed
Step 2: Check Compiler Installation
- In the Preferences window, navigate to General > Compilers
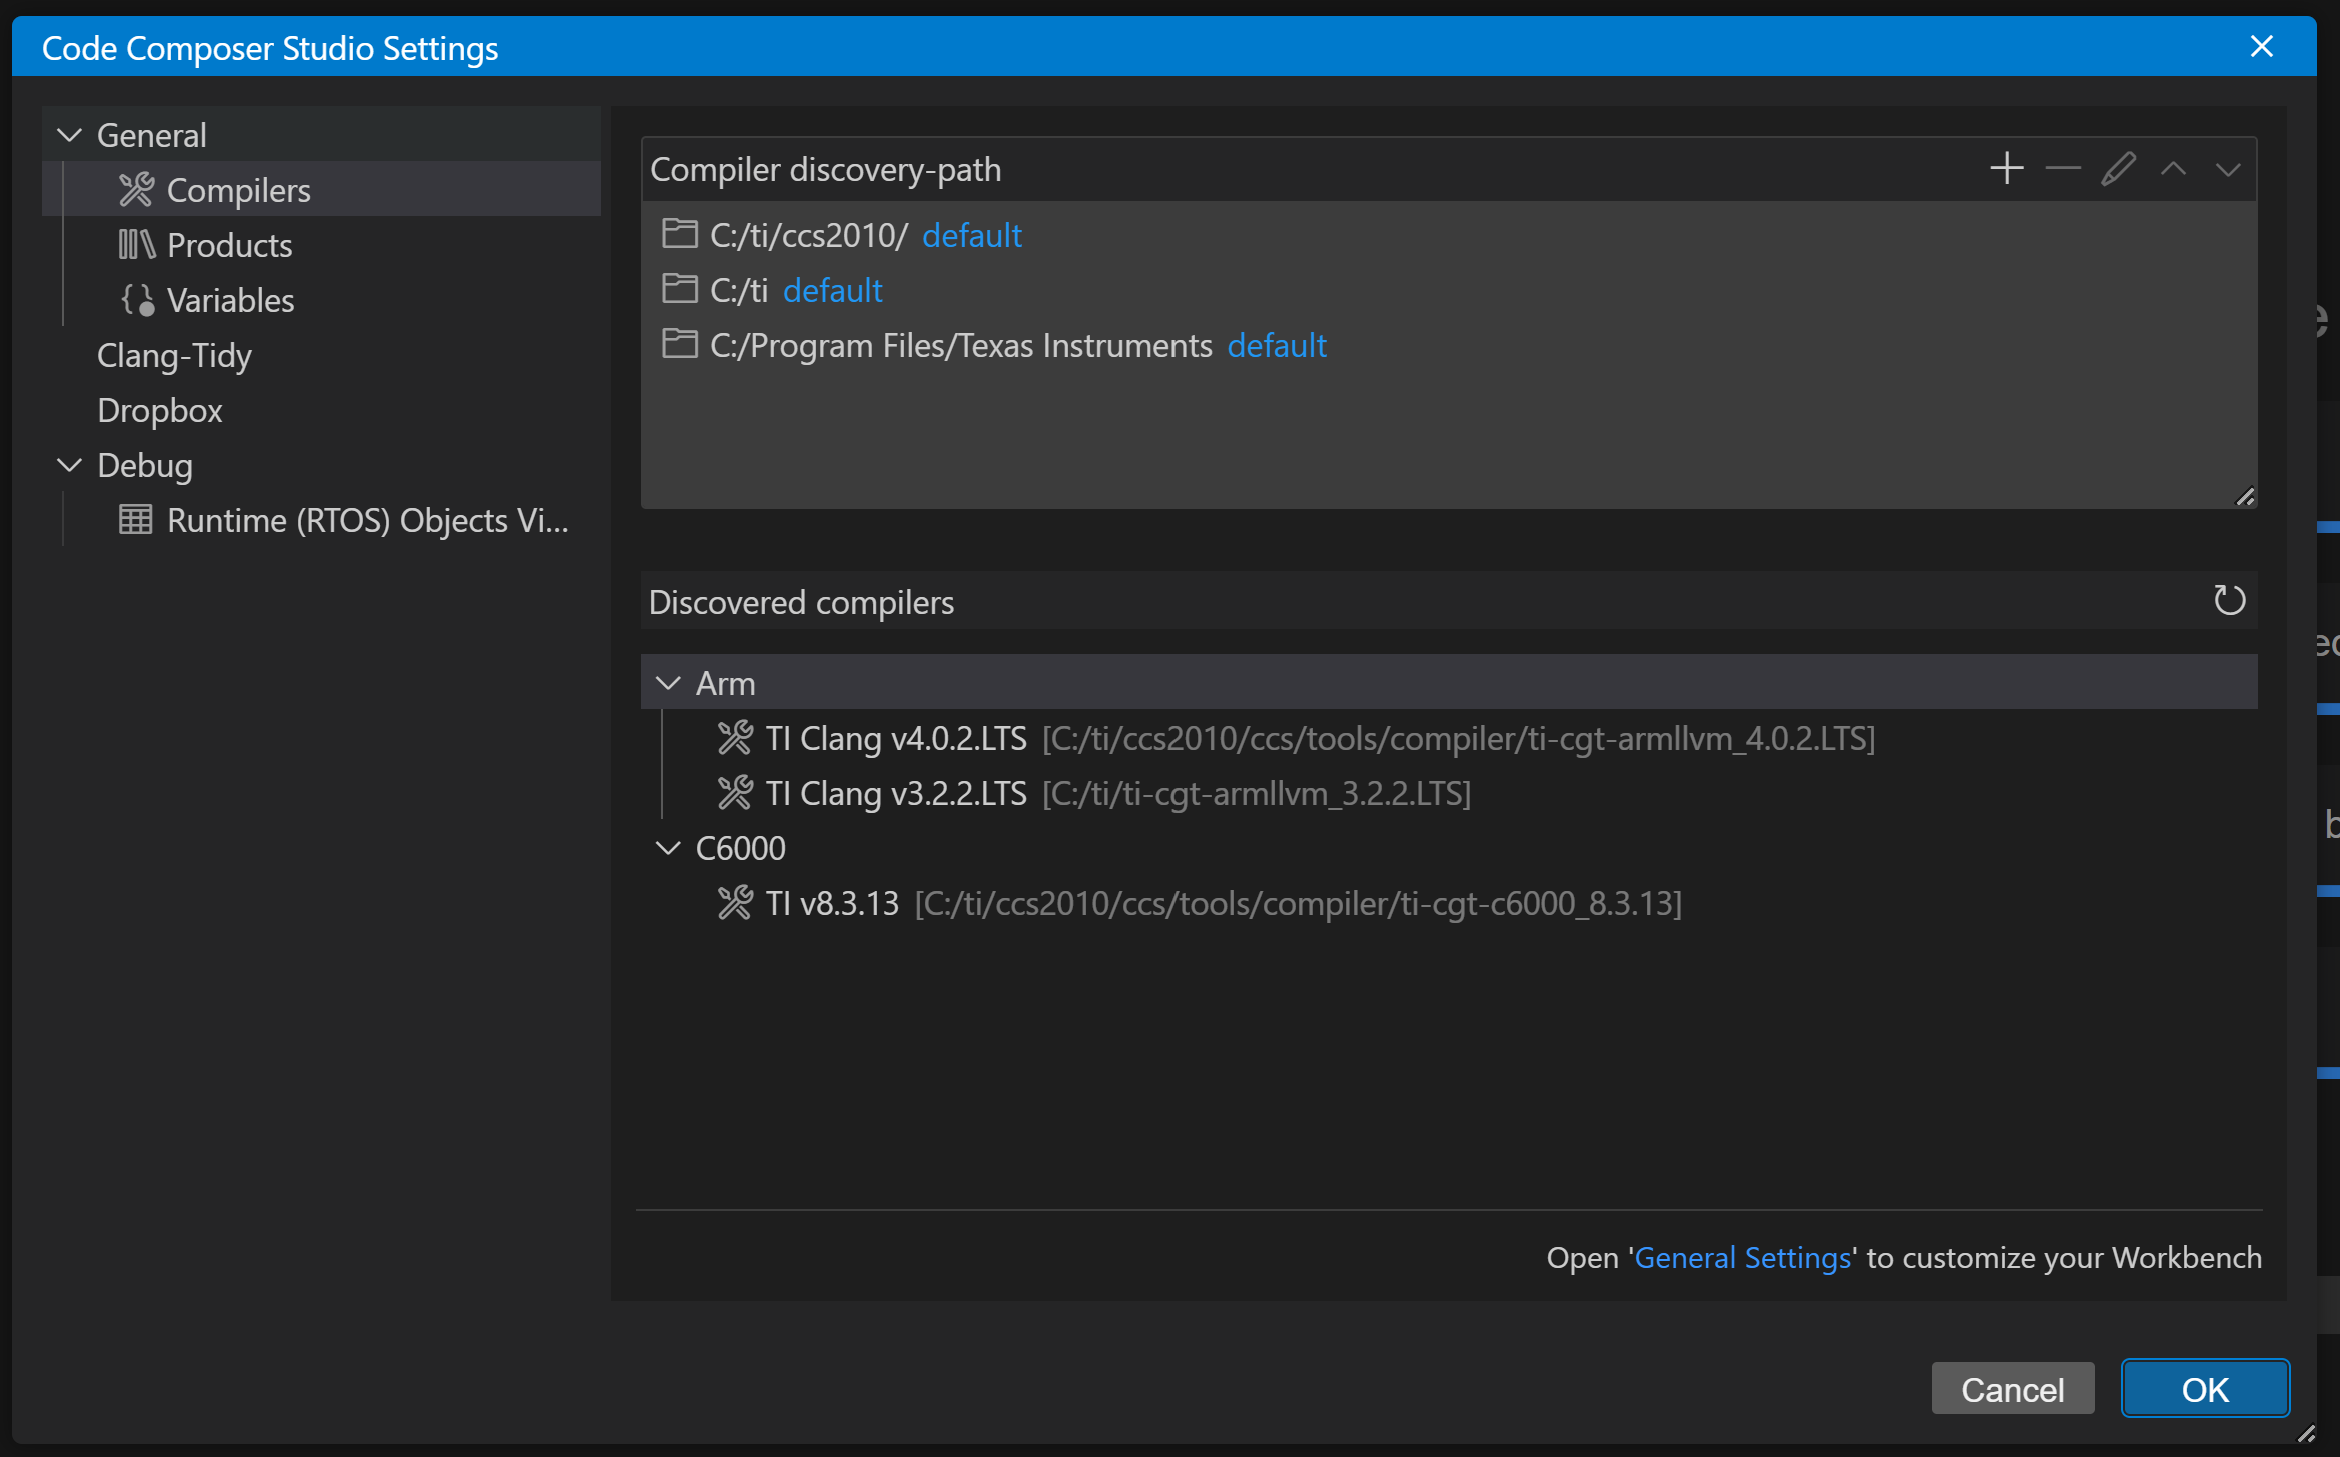
CCS Compilers
- Verify that TI CLANG 4.0.2.LTS is listed
Creating Target Configuration for xWRL684x
The target configuration connects CCS to your EVM. Follow these steps to create one:
Step 1: Copy Device Configuration File
- Delete the existing awrl68xx.xml and iwrl68xx.xml in
C:/ti/ccs2010/ccs/ccs_base/common/targetdb/devices
- Copy the awrl68xx.xml and iwrl68xx.xml file from
${SDK_INSTALL_PATH}/tools/CCS_SupportFiles
- Paste the to
C:/ti/ccs2010/ccs/ccs_base/common/targetdb/devices folder
Step 2: Import Target Configuration
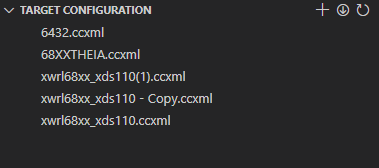
- In CCS, go to Debug > Target Configuration

Target Configuration
- In the Target Configuration window, click on the
 button
- Browse to
${SDK_INSTALL_PATH}/tools/CCS_SupportFiles
- Select the xwrl68xx_xds110.ccxml file and click "Open"
Alternatively, you can create a new configuration manually:
Step 2 (Alternative): Create New Target Configuration
- In CCS, go to Debug > Target Configuration
- In the Target Configuration window, click on the "+" button
Target Configuration
- Give your configuration a descriptive name (e.g., "xwrl68xx_xds110")
- Select connection as "XDS110 USB Debug Probe"
- In "Board or Device" dropdown, select "AWRL68xx" or "IWRL68xx"
- Save and close the configuration
UART Terminal Setup
To view debug output from your applications:
- In CCS, go to View > Console > Serial Console
- Click the
 button
- In the dialog:
- Set the serial port to the COM port connected to your EVM
- Set baud rate to 115200
- Set Data Size to 8
- Set Stop bits to 1
- Set Parity to None
- Click "OK" to open the terminal connection
Building Examples
You can build examples using either makefiles (command line) or CCS projects.
Building with Makefiles
- Open a command prompt (Windows) or terminal (Linux)
- Navigate to the SDK installation directory:
- Build the example using gmake (Windows) or make (Linux):
# Windows example:
gmake -s -C examples/hello_world/xwrL684x-evm/r5fss0-0_freertos/ti-arm-clang
# Linux example:
make -s -C examples/hello_world/xwrL684x-evm/r5fss0-0_freertos/ti-arm-clang
Building with CCS Projects
- In CCS, go to File > Import Project(s)
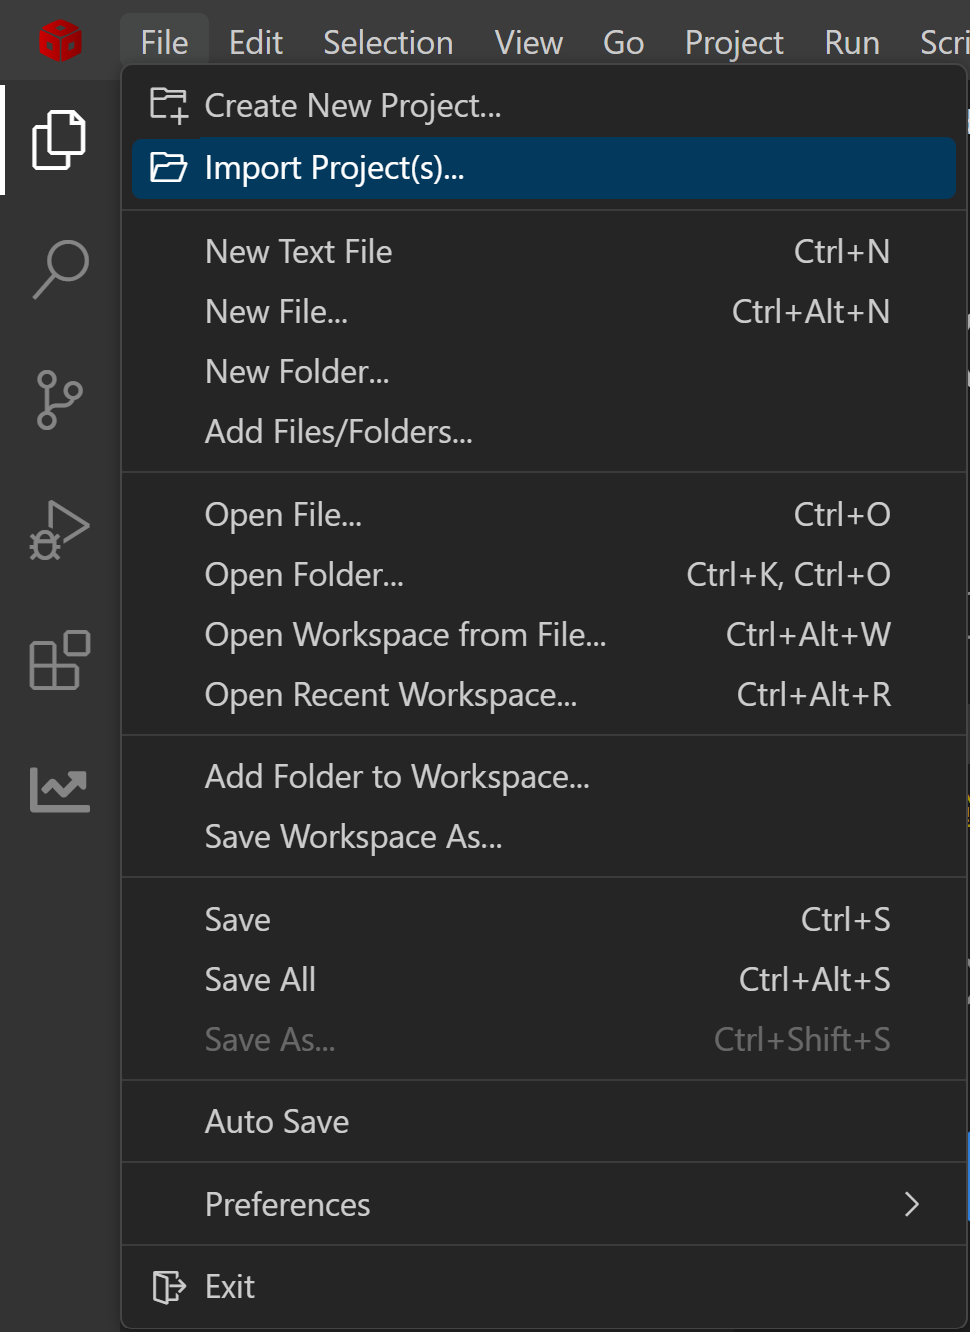
Import Projects
- Click "Browse" and navigate to
${SDK_INSTALL_PATH}/examples/hello_world
- Select the project
hello_world_xwrL684x-evm_r5fss0-0_freertos_ti-arm-clang
- Click "Finish" to import the project
- Right-click on the imported project and select "Build Project"
For additional details on importing of projects refer to Import a Project in CCS
Building System Projects
System projects combine multiple cores (APPSS, FECSS, C66SS) into a single metaimage:
Using Makefiles:
cd ${SDK_INSTALL_PATH}
gmake -s -C examples/drivers/uart/uart_echo/xwrL684x-evm/system_freertos
Using CCS:
- Import the system project from
${SDK_INSTALL_DIR}/examples/uart/uart_echo
- Select the project
uart_echo_{board}_system_{os}
- The individual R5F and C66 projects will be imported automatically
- Right-click on the system project and select "Build Project"
- This will automatically build the individual R5F and C66 projects
Rebuilding Libraries
If you modify source files within libraries:
cd ${SDK_INSTALL_PATH}
gmake -s libs PROFILE=debug # for debug mode libraries
# OR
gmake -s libs PROFILE=release # for release mode libraries
Loading and Running Examples
Step 1: Launch Target Configuration
- In CCS, go to Debug > Target Configurations
- Right-click your target configuration file (e.g., "xwrl68xx_xds110.ccxml") and select "Start Project-less Debug"
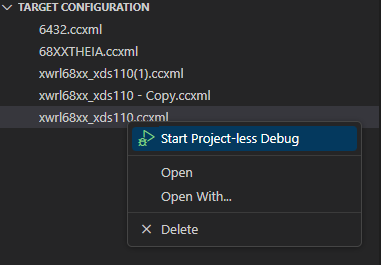
Project Less Debug
- The target will appear in the Threads window
Step 2: Power On and Connect
- Power ON the EVM
- In the Threads window, right-click on "Cortex_R5_0" / "C66xx_DSP" and select "Connect Target"
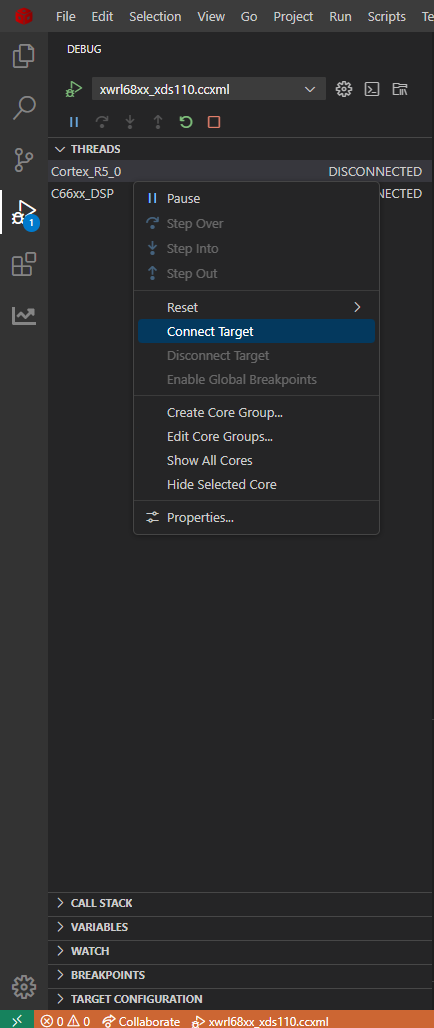
Threads Window
Step 3: Reset and Load Program
- Right-click on the connected CPU and select "Reset > CPU Reset"
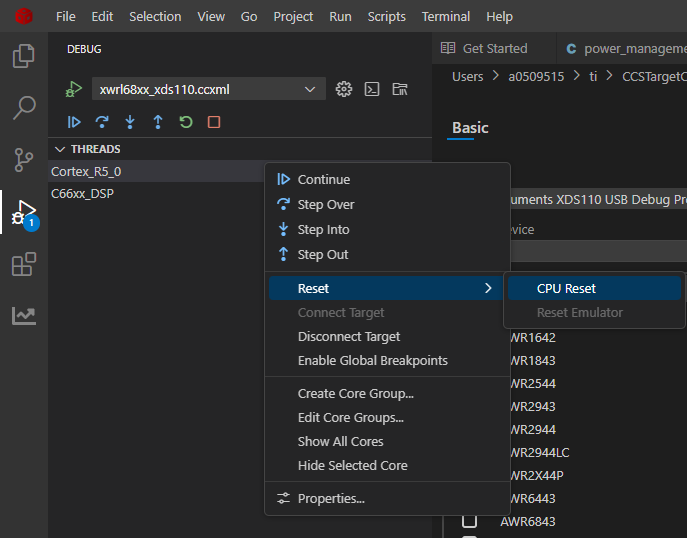
CPU RESET
- Left-click on the connected CPU and select "Run > Load Load Program"
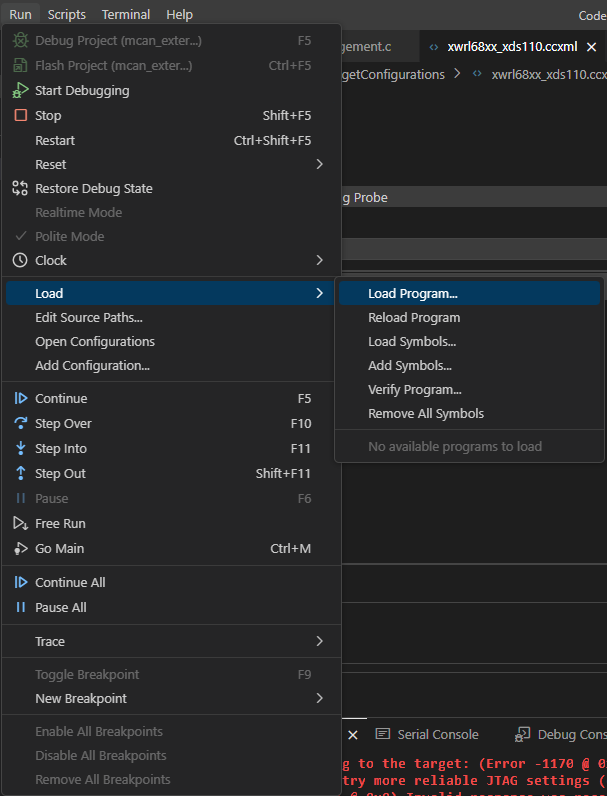
Load Program
Step 4: Select the Program
For makefile builds:
- Click "Browse" and navigate to your built executable
- Example:
${SDK_INSTALL_PATH}/examples/hello_world/xwrL684x-evm/r5fss0-0_freertos/ti-arm-clang/hello_world.release.out
Step 5: Run the Program
- After loading, the execution will halt at the main() function
- Click the
 button to run the program
- View program output in the Console or Terminal window
Reloading Programs
To reload or run a different program:
- Reset the CPU before loading a new program
- In most cases, you don't need to power cycle the EVM
- If the CPU or device is in an exception state, power cycle the EVM and start over
Troubleshooting
Common Setup & Usage Issues and Solutions
Problem: SysConfig not showing in CCS Products list
Solution: Refer to Check Packages as seen by CCS
Problem: Cannot connect to target
Solution:
- Verify power to the EVM
- Check JTAG cable connections
- Ensure boot mode switches are correctly set
- Close and reopen CCS, then try again
Problem: Program fails to execute after loading
Solution:
- Check console for error messages
- Verify EVM is properly initialized
- Reset CPU and reload the program
- As a last resort, power cycle the EVM and start over
Next Steps
After successfully setting up CCS and running examples:
 1.8.20