AM62X-SK
- Note
- Refer to EVM page for more details on the EVM, https://www.ti.com/tool/SK-AM62
Cable Connections
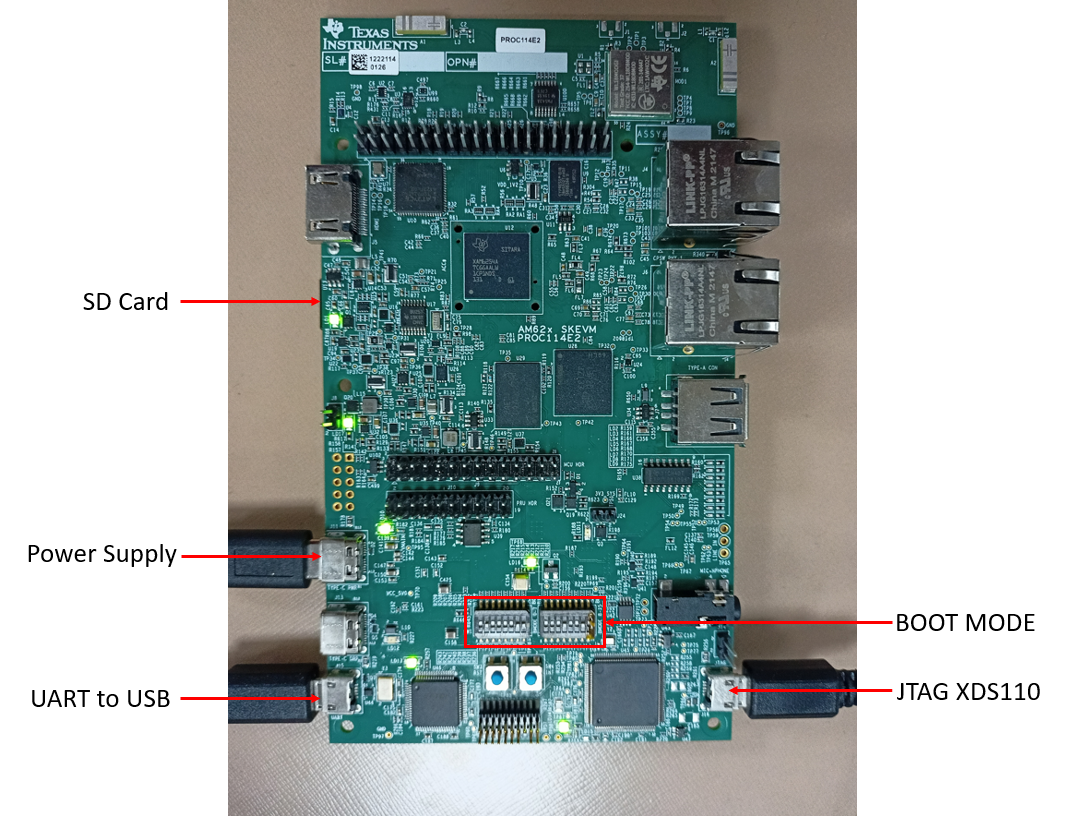
- The figure below shows some important cable connections, ports and switches.
- Take note of the location of the "BOOTMODE" switch, this is used to switch between different boot modes like OSPI, UART, SD, NOBOOT mode
AM62X-SK-EVM
Setup UART Terminal
- Many examples use a standard UART terminal to log the output from the examples. You can use any UART terminal program for the same. Below steps show how to setup the UART terminal from CCS.
- First identify the UART port as enumerated on the host machine.
- Make sure that the EVM and UART cable connected as shown in Cable Connections
- In windows, you can use the "Device Manager" to see the detected UART ports
- Search "Device Manager" in Windows Search Box in the Windows taskbar.
- If dont see any USB serial ports listed in "Device Manager" under "Ports (COM & LPT)", then make sure you have installed the UART to USB driver from FTDI, https://www.ftdichip.com/FTDrivers.htm.
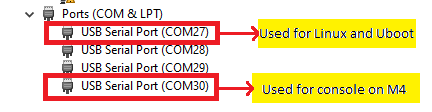
Identify UART Port in Windows Device Manager
- In CCS, goto "View > Terminal"
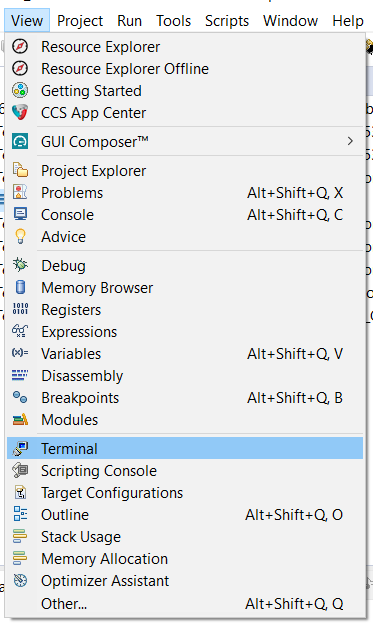
UART Terminal Menu

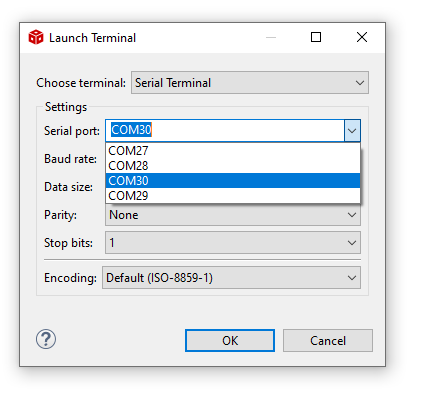
Open New UART Terminal
- Select the UART port, keep other options to default, i.e 115200 baud rate - 8 data bits - No parity - 1 stop bit,
- We use the 1st USB serial port, as seen in the device manager, for uboot and Linux.
- We use the 4th USB serial port, as seen in the device manager, as terminal output for examples which run from M4F
Connect to UART port
- In this screenshot this happens to be COM27 and COM30. However on your machine this could be different. One tip to make sure there is no mistake in identifying the UART port is to disconnect all other UART to USB devices other than this EVM before checking in device manager.
SOC Initialization
Before any program can be loaded and run on the EVM, the SOC needs to be initialized. Below sections describes the various options available for SOC initialization.
SOC Initialization Using SPL
- Attention
- This is a recommended one time step that needs to be done before you can load and run programs via CCS
- Prepare a SD card with Linux image by following the Processor SDK Linux - Create SD card page.
- POWER-OFF the EVM
- Make sure below cables are connected as shown in Cable Connections
- Power cable
- JTAG cable
- UART cable
- Set EVM in SDCARD BOOT mode as shown below
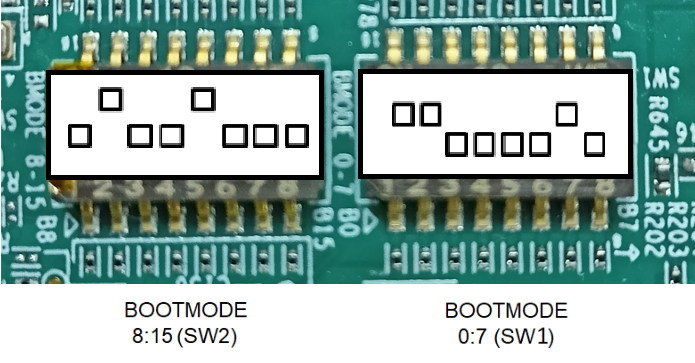
SD CARD BOOT MODE
- Insert the prepared SD card on the SD card slot.
- Setup UART terminals for Uboot/Linux and the M4 console as per Setup UART Terminal section.
- POWER-ON the EVM
- Uboot and Linux should come-up on the UART terminal.
- While Linux is booting, the remoteproc should start M4 as shown below.
[ 6.124861] k3-m4-rproc 5000000.m4fss: assigned reserved memory node m4f-dma-memory@9cb00000
[ 6.141637] k3-m4-rproc 5000000.m4fss: configured M4 for remoteproc mode
[ 6.154843] k3-m4-rproc 5000000.m4fss: local reset is deasserted for device
[ 6.170602] remoteproc remoteproc0: 5000000.m4fss is available
[ 6.196447] remoteproc remoteproc0: powering up 5000000.m4fss
[ 6.202553] remoteproc remoteproc0: Booting fw image am62-mcu-m4f0_0-fw, size 78960
[ 6.242673] remoteproc0#vdev0buffer: assigned reserved memory node m4f-dma-memory@9cb00000
[ 6.251498] remoteproc0#vdev0buffer: registered virtio0 (type 7)
[ 6.257790] remoteproc remoteproc0: remote processor 5000000.m4fss is now up
- Setting up the board for Linux boot requires to be done only once with the EVM. But after every power cycle of the board, we need to wait for the linux to come up before loading binaries to AM62x M4 through CCS.
Troubleshooting EVM issues
- JTAG connection fails on some EVMs with the following error. Need to connect the JTAG cable after board is powered on.
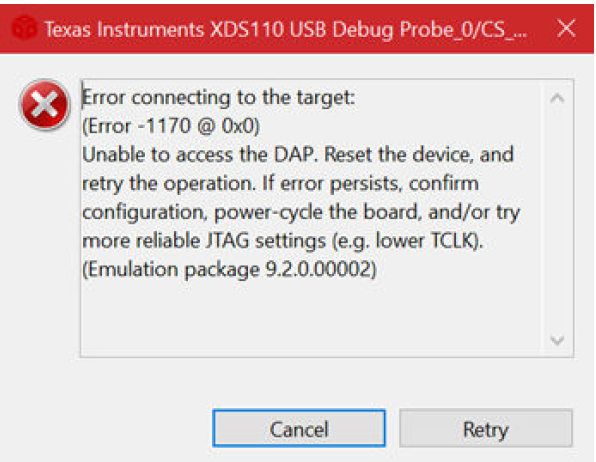
JTAG Connection Error Dialog


 1.8.20