Fundamentals#
Texas Instruments
2 hours read
This workshop will introduce you to the TI Wi-SUN FAN Stack and teach you how to set up a Wi-SUN FAN.
Introduction#
An intermediate level of knowledge of the C programming language and some experience with embedded software development is needed to be able to complete the tasks.
In task one, you will learn how to set up a Border Router device and how to send commands over the PySpinel interface. In task two, you’ll set up a Router Node. In the third task the network is started and the connection is formed. In the fourth task, you learn how to send a ping over the network.
It is recommended to read the TI Wi-SUN FAN User’s Guide alongside this lab for details and further information.
Prerequisites#
Hardware#
For this lab, you need two Wi-SUN enabled development boards. One board will run the Border Router application and the second one will run the Router Node application. Supported devices are:
These devices are interchangeable in the lab.
You will also need a computer to act as the host to the network processor. You can use Windows or Linux. You will need git on your computer.
Software#
Python v.3.6.8 or later (including pip)
CCS installed with support for CC13xx/CC26xx devices.
Recommended reading#
Getting started – Desktop#
Install the SDK#
Open Resource Explorer via View → Resource Explorer and find the SDK you want to install.

On the right side, you will see a download icon. Click this to install the SDK and all its dependencies.

Download the off line installer from the SDK links above under
PrerequisitesRun the SimpleLink CC13XX-CC26XX SDK installer:
simplelink_cc13xx_cc26xx_sdk_x_xx_xx_xx.exe. These instructions assume you have installed to the default directory:C:\ti\
Install Python 3.x#
Python 3.x is needed for the network processor interface. Python can be installed directly from www.python.org. If asked, make sure to include pip with the installation.
Install the TI Wi-SUN FAN PySpinel GitHub Repo#
Within the tools folder of the SDK, there is a file called setup_pyspinel.bat.
Running this file will automatically clone and setup the TI git repository that
contains the NWP python files for your use.
Open the SDK and navigate to the tools folder
<SDK_INSTALL_DIR>\tools\ti_wisunfan.

Run the file called
setup_pyspinel.batto setup the TI git repo. Click on the file to start running it, and the repository will be setup inside of the tools folder in your SDK.After running the .bat file, a folder pyspinel_repo is created. In this folder, another folder is created for the actual repo: ti-wisunfan-pyspinel. The release tag corresponding to your SDK release is already checked out.
Depending on your Python setup, running the
.batfile may give you a pip error:
If this happens, follow the recommendation to update pip and then install the requirements.
$ pip install --upgrade pip
Then install the requirements:
$ pip install -r requirements.txt
Hint
Yay! All the components are ready and we can start setting up the network!
Wi-SUN Network#
The Wi-SUN FAN mesh network consists of two types of logical devices: The Border Router (BR) device and the Router Node (RN) devices.
Each PAN contains a BR providing WAN connectivity to the PAN. The BR maintains source routing tables for all nodes within its PAN, provides node authentication and key management services, and disseminates PAN wide information such as broadcast schedules.
In addition there is one or more RNs, which provide upward and downward packet forwarding (within a PAN). An RN also provides services for relaying security and address management protocols.

Task 1 – Run the Border Router Project#
Note
TI Wi-SUN FAN example projects take a few minutes to build. This can be a bit inconvenient. For this reason try to make any alterations before you start building. This lab (except bonus task) will require you to build only once.
Luckily, the examples are available as network processors. This means that in most cases you will only need to build the project once. Most network configurations can be made at runtime.
In the first task we will set up a Border Router device. This device will be the root of the network.
Import in Code Composer Studio#
Open Code Composer Studio and import the BR project:
In CCS, open Project → Import CCS Projects…
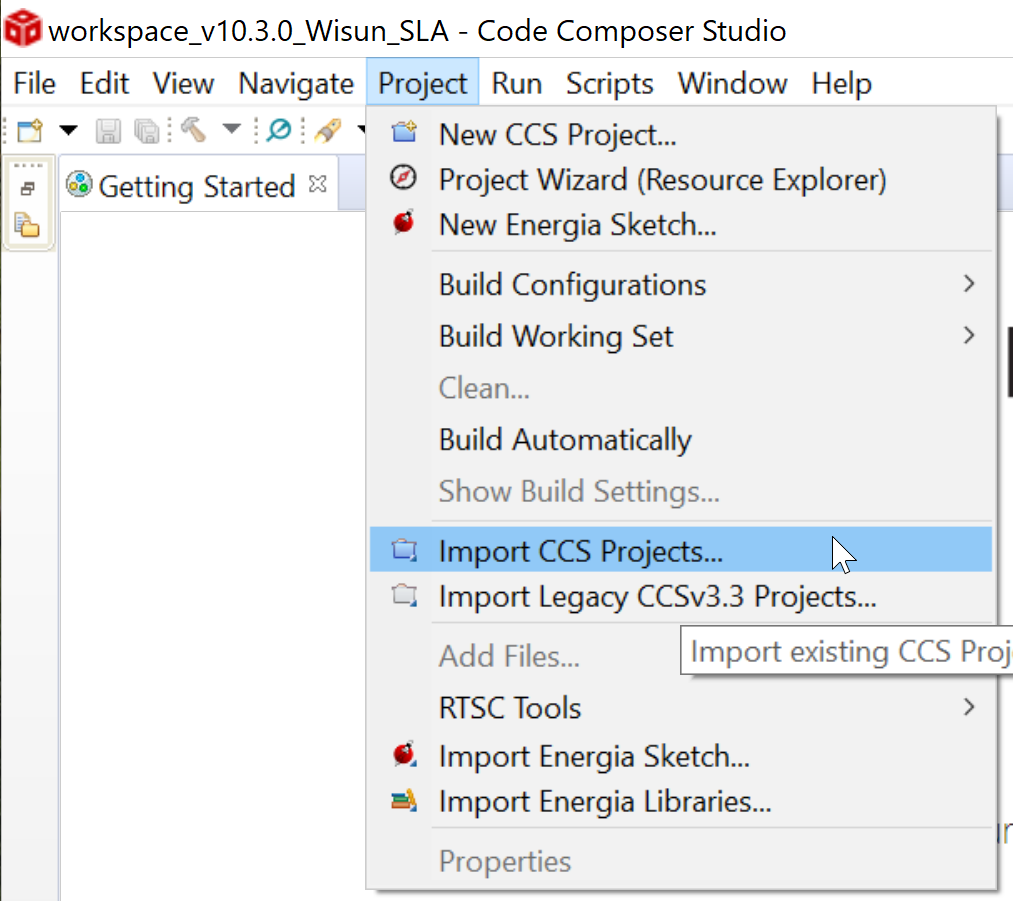
Navigate to the
ns_brfolder for your development board and press Select Folder. The path is:<SDK_INSTALL_DIR>\examples\rtos\<DEVELOPMENT_BOARD>\ti_wisunfan\ns_brSelect the discovered project and press Finish.
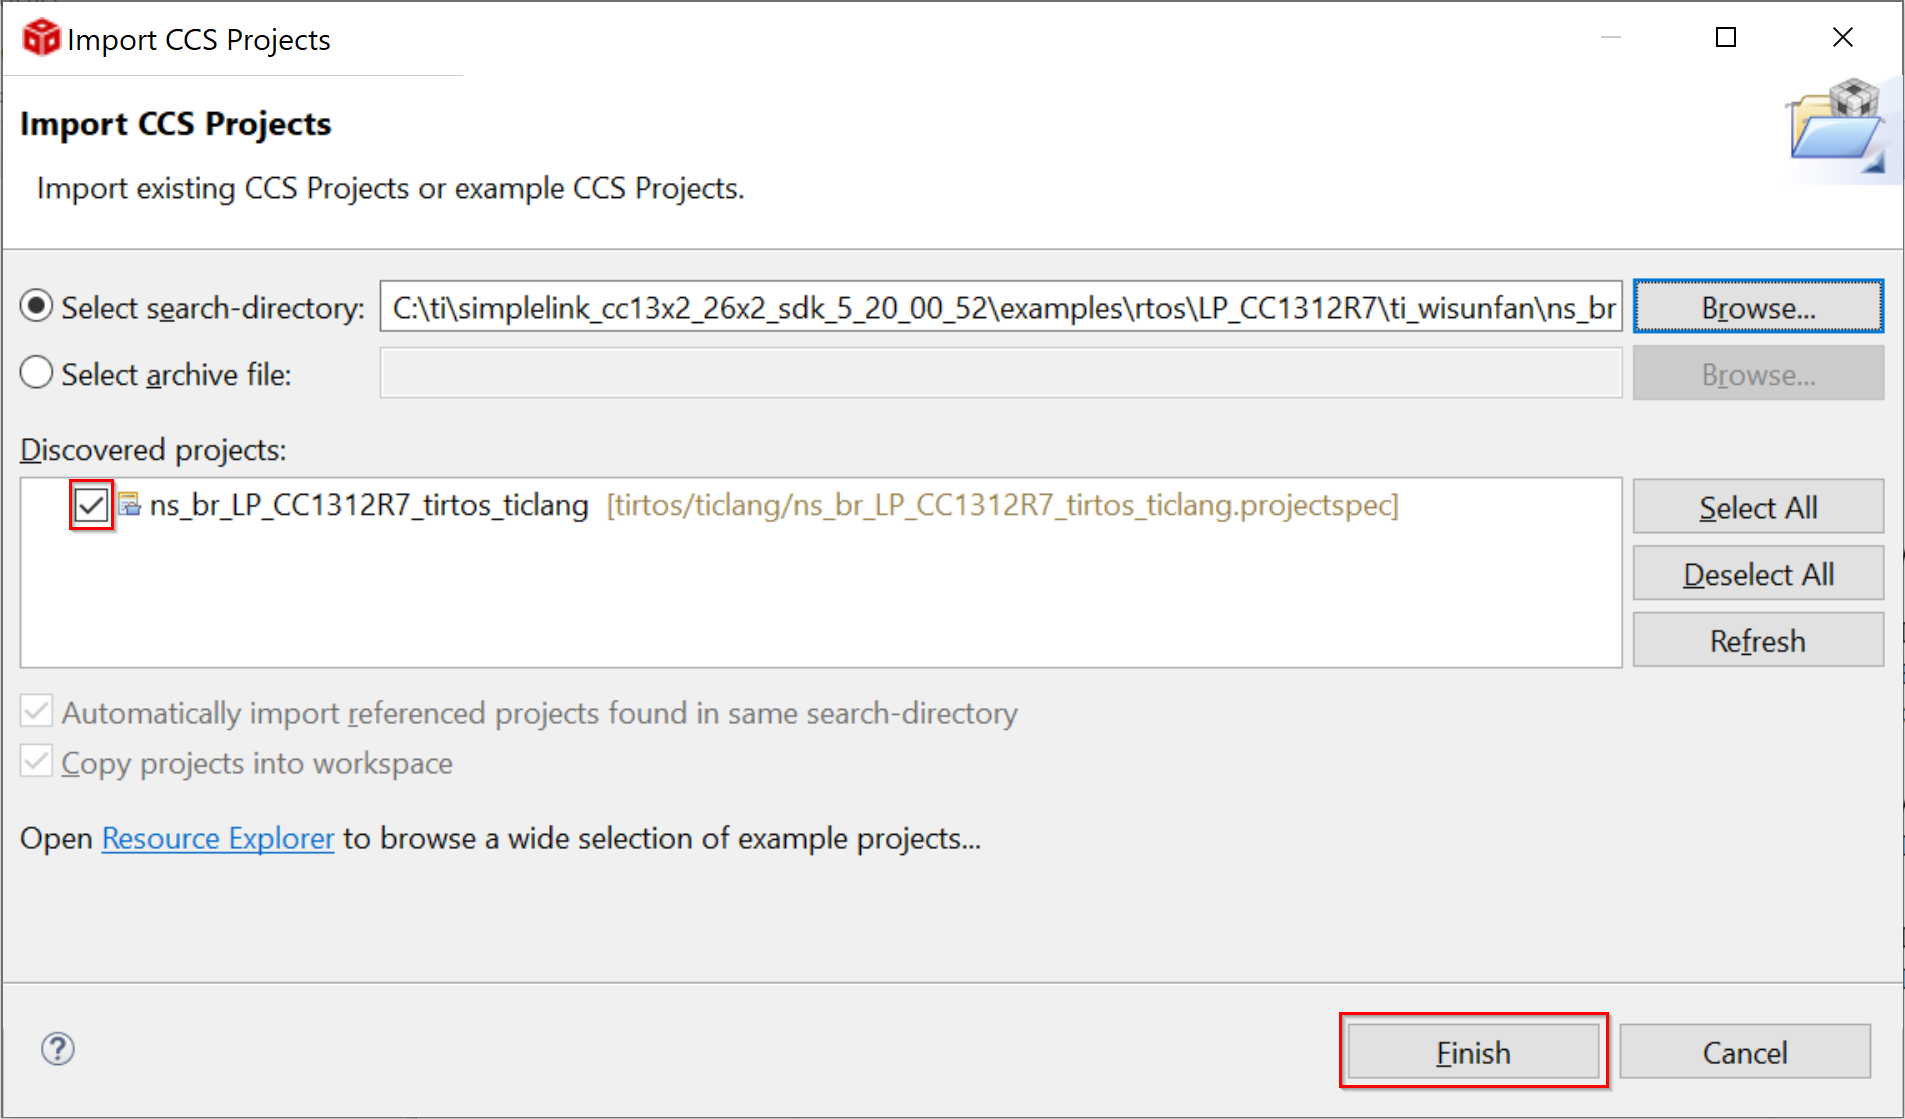
The project will appear in your Project Explorer window as shown below.

Connect the LaunchPad#
Start by making sure your kit is assembled, turned on, and connected to the PC via the USB cable.
When the LaunchPad is connected, the Windows Device Manager (Start → Control Panel → Device Manager, or Win+X, M on Windows 10) will show you the following devices connected:

Device Manager#
The Application/User UART serial port is used for application output in this
example.
If you are using a Linux computer, use the dmesg | grep tty command to get a
chronological list of all devices. The second to last is the one we want to use
(e.g. /dev/ttyACM0).
Note down the COM or tty number, we will use it soon!
Build the Projects and Flash the Device#
Build the project by right-clicking on it and selecting
Build Project.Alternatively build all projects by pressing Ctrl + B.
Program the project by right clicking on it and selecting Debug As → Code Composer Debug Session
When the IDE is halted at the
mainfunction, terminate debugging session by clicking Ctrl + F2 or the square red stop icon.
Note
The first time you program your device, you may be prompted by CCS to update the debugger on the LaunchPad. You will need to do this in order to be able to program the device with CCS. Make sure you only run the update once at a time.
Connect the Network Processor Interface#
We will use the spinel-cli.py file to control the Border Router device. To run
a python script, open a command terminal or similar. Here, git bash is used.
Navigate to the location of
spinel-cli.py,<SDK_INSTALL_DIR>\tools\ti_wisunfan\pyspinel_repo\ti-wisunfan-pyspinel$ cd \c\ti\simplelink_cc13xx_cc26xx_sdk_6_10_00_29\tools\ti_wisunfan\pyspinel_repo\ti-wisunfan-pyspinel
Remember the USB port we found in the Section Connect the LaunchPad? We will use it now. Call the
spinel-cli.pywith the COM or tty port added as an argument. The “Module readline unavailable” message can be ignored.$ python spinel-cli.py -u COM4 spinel-cli >
$ python spinel-cli.py -u /dev/ttyACM0
spinel-cli >
If you encounter any error message please have a look at the following fixes.
Serial error message…
If you have both pyserial and serial installed, you might get the following error:
$ python spinel-cli.py -u COM10 Couldn't open COM10 module 'serial' has no attribute 'Serial' Traceback (most recent call last): File "spinel-cli.py", line 1839, in
main() File "spinel-cli.py", line 1816, in main options.baudrate, options.rtscts) File "C:\ti\simplelink_cc13x2_26x2_sdk_5_20_00_52\tools\pyspinel_repo\ti-wisunfan-pyspinel\spinel\stream.py", line 185, in StreamOpen return StreamSerial(dev, baudrate, rtscts) File "C:\ti\simplelink_cc13x2_26x2_sdk_5_20_00_52\tools\pyspinel_repo\ti-wisunfan-pyspinel\spinel\stream.py", line 55, in __init__ self.serial = serial.Serial(port=dev, AttributeError: module 'serial' has no attribute 'Serial' If this happens, try uninstalling both pyserial and serial.
$ python -m pip uninstall serial pyserial
Then install only pyserial:
$ python -m pip install pyserial
Then try again running the
spinel-cli.pyscript.Port error message…
When trying to open a port where you don’t have the permission, you may get an error message.
$ python spinel-cli.py -u /dev/ttyACM0 Couldn’t open dev/ttyACM0 [Errno 13] could not open port dev/ttyACM0: [Errno 13] Permission denied: ‘dev/ttyACM0’ ...
One way of getting this permission is using the following command:
$ sudo chmod 666 /dev/ttyACM0
You may need to repeat this every time you disconnect and reconnect the USB cable.
Another reason why you may get this error is that some other program has opened the port. If you’re unsure whether this is the case, you can unplug and replug the USB cable.
Run Some Commands#
Now that we have the network processor interface up and running, we can run some commands. For example, we can check the version of the image running on the LaunchPad:
spinel-cli > ncpversion
TIWISUNFAN/1.0.0; RELEASE; Jul  23 2021 13:54:01
Or we can ask for all available commands to be displayed using help:
spinel-cli > help
Hint
We have the BR running… Let’s set up a peer device to keep it company!
Task 2 – Run the Router Node Project#
In this task we will set up a Router Node to connect with the Border Router. Here we will set up one, but in a real mesh network there will be many of these devices. The steps for programming a launchpad are the same as for the BR project.
Import in Code Composer Studio#
Open Code Composer Studio and import the RN project, ns_coap_node.
The steps are the same as for the BR project, but the path is different:
<SDK_INSTALL_DIR>\examples\rtos\<DEVELOPMENT_BOARD>\ti_wisunfan\ns_coap_node.
When you have imported the project, it will show up in CCS as follows:

Connect the LaunchPad#
Connect your second LaunchPad to the laptop via USB. Again, you can check that it appears in Windows Device Manager.
When you have two launchPads connected to your laptop, it’s important to make sure the correct one is programmed by CCS when you press the Debug button. If not, you risk that one LaunchPad is never programmed while the other one is overwritten each time you press the debug button. One way to avoid this is to assign a specific LaunchPad to each CCS project. Instructions for this is found here.
Build the Projects and Flash the Device#
Build the project, program it and terminate the debug session using the same steps as for the BR device.
Run the Project#
The ns_coap_node project is a fully embedded implementation. If you want to
run an RN as a network processor, you can use the ns_node project of the
Router Node. This means we don’t need to connect through the network processor
interface. Instead, the CoAP Node automatically looks for a Wi-SUN network to
join after booting. If it finds a network with matching network parameters it
will join it.
You will notice the green LED starts flashing when the CoAP Node is running.
To see the connection status of the CoAP Node, let’s open a UART terminal.
Connect a Terminal Program#
To see the serial output from the LaunchPad it is necessary to use a terminal emulator. There are several options. We will use PuTTy.
Terminal Program Options
There are several options for terminal program:
Or even just going to the command prompt and typing for example
type COM10:.Type
help modeto learn how to set the port parameters.
Set your terminal emulator settings to 115200 baud rate, 8 bit data, 1 stop
bit, no parity, and no flow control.

PuTTY Terminal configuration#
When you press the power button on the LaunchPad (next to the micro USB connector), you will see the following print out in your terminal:
PuTTY Terminal window#
Task 3 – Form the Connection#
Let’s start by starting the network from the Border Router device. We will start by checking the network name and PAN ID:
spinel-cli > networkname
Wi-SUN Network
Done
spinel-cli > panid
0xabcd
Done
You can use these commands to change the network name and PAN ID. However, make sure you change these parameters on the Router Node side as well or it won’t be able to connect!
How to change network name and PAN ID on the CoAP node
Open SysConfig by double-clicking
ti_wisunfan_router_node.syscfg.
Select TI Wi-SUN FAN Stack and open the Network tab. Here you can select the PAN ID and Network name you wish.

Save the
.syscfgfile, rebuild the project and reprogram the device.Don’t forget to set the same PAN ID and network name on the BR!
spinel-cli > networkname Best Network
Best Network
Done
spinel-cli > panid
0xa1a1
Done
It’s time to start the network. The first command we need is the
ifconfig upcommand which brings up the network interface:spinel-cli > ifconfig up Done
The second command we need is
wisunstack. This command tells you the status of the Wi-SUN FAN network. Call it with thestartkeyword to start the network.spinel-cli > wisunstack start Done spinel-cli > wisunstack start Done
Note
It can take several minutes for the Router Node to join the network. This is because both the BR and the RN are frequency hopping.
From the BR side, we can use the
routerstatecommand to check the join status of this device. For the BR, we expect this to be 5 when the network is operational.spinel-cli > routerstate 5 Successfully joined and operational Done
I got a different status…
If the return status is something other than 5, the network has not yet started. For example if you get a 0 status.
In most cases this means you forgot to run the
ifconfig upor thewisunstack startcommand. Rerun these and retry!We can use
connecteddevicesto check if any devices are connected yet.spinel-cli > connecteddevices List of Connected Devices currently in routing table: No nodes currently in routing table.
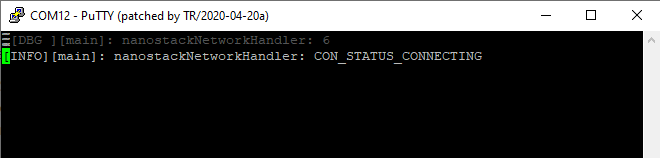
After a few minutes the RN will join the network. The green LED will stop flashing. When this happens the RN will print out a message over UART.

UART Output of the RN#
On the BR, you can send the
connecteddevicescommand:spinel-cli > connecteddevices List of Connected Devices currently in routing table: fd00:7283:7e00:0:212:4b00:14f7:d1b5 Done
We have a connection! At this point you can add more RNs to the network, or you can continue with the next task. If you choose to add more routers, you can use the
connecteddevicescommand to get a list of all devices in the network.spinel-cli > connecteddevices List of Connected Devices currently in routing table: fd00:7283:7e00:0:212:4b00:1ca1:727a fd00:7283:7e00:0:212:4b00:1ca6:17ea Done
Task 4 – Ping the Router Node#
In this task, we will send a ping from the Border Router, to the Router Node.
First we need to know the DHCP (Dynamic Host Configuration Protocol, this address format is used in UDP and IP networks) address of this RN. If we only have one RN in the network, we can use the
connecteddevicescommand on the BR. This will print out the address of all connected devices.spinel-cli > connecteddevices List of Connected Devices currently in routing table: fd00:7283:7e00:0:212:4b00:14f7:d1b5 Done
If we have multiple RNs in the network, let’s use the terminal display on the RN to see it’s address. When the RN first connected to the network, it printed it’s own address as the
CON_STATUS_LOCAL_UP. Here, it’sfd00:7283:7e00:0:212:4b00:14f7:d1b5.
UART Output of the RN#
Now we can use the
pingcommand from the BR:spinel-cli > ping fd00:7283:7e00:0:212:4b00:14f7:d1b5 56 bytes from fd00:7283:7e00:0:212:4b00:14f7:d1b5: icmp_seq=50089 hlim=64 time=118ms
In the return message you can even see the turnaround time.
That’s ok… but maybe there’s a command we can use and see the effect on the RN side as well? A good starting point would be to check the PySpinel command documentation. You can find it in the README file in the TI Wi-SUN FAN PySpinel GitHub repo.
Solution
If you search for CoAP in the README you will find the coap specific command:
spinel-cli > coap fdde:ad00:beef:0:558:f56b:d688:799 get con led
CoAP packet received from fe80::212:4b00:10:50d4: type: 2 (Acknowledgement), token len: 0, code: 2.05 (Content), msg_id: 1
CoAP options: Content-Format (12): b''
RLED state: Off, GLED state: On

spinel-cli > coap fdde:ad00:beef:0:558:f56b:d688:799 post con led --led_state r 1
CoAP packet received from fe80::212:4b00:10:50d4: type: 2 (Acknowledgement), token len: 0, code: 2.04 (Changed), msg_id: 2
CoAP options: Content-Format (12): b''
No CoAP payload

spinel-cli > coap fdde:ad00:beef:0:558:f56b:d688:799 get non led
CoAP packet received from fe80::212:4b00:10:50d4: type: 2 (Acknowledgement), token len: 0, code: 2.04 (Changed), msg_id: 2
CoAP options: Content-Format (12): b''
No CoAP payload
For example, we can light the red LED on our RN by sending the command with
--led_state r 1.spinel-cli > coap fd00:7283:7e00:0:212:4b00:14f7:d1b5 post con led --led_state r 1 spinel-cli > CoAP packet received from fd00:7283:7e00:0:212:4b00:14f7:d1b5: type: 2 (Acknowledgement), token len: 0, code: 2.04 (Changed), msg_id: 0 CoAP options: Content-Format (12): b'' No CoAP payload
Bonus Task – Set up a Sniffer#
A sniffer log can be very useful for debugging, or if you’re just curious about what’s going over the air. In short, a sniffer will observe all the packets going back and forth in the network.
In this task we will set up a sniffer to keep track of the network. You will need one additional LaunchPad. The following are supported:
We will keep the Border Router and Router Node(s) running, but some configuration is required.
To set up the sniffer, follow the steps in the TI Wi-SUN FAN User’s Guide → Debugging → Packet Sniffer.
Pay attention to the final section, Application Setup. Here you can find the
specific application changes needed.
Hint
That’s it! Very well done!