Introduction
In this lecture, we will explore the UniFlash ImageCreator tool which is used to program the external serial flash used by the SimpleLink Wi-Fi CC32xx and CC31xx devices. The programming image is a file containing the SimpleLink device configurations and files required for the operation of the device. For the CC32xx wireless microcontroller, the programming image also includes the host application file.
Before beginning development, it's important for SimpleLink Wi-Fi users to understand how to:
- Set up the LaunchPad in Development mode for debugging
- Flash application code
- Update to the latest service pack
- Add user files to the file system
- Utilize some of the security features of the CC32xxS and CC32xxSF devices
This lecture will cover these topics with the CC32xx LaunchPad/CC31xx BoosterPack and the UniFlash ImageCreator tool.
UniFlash v4.6.0
This lecture only covers version 4.6.0 or later of UniFlash.
Hardware Prerequisites
- 1x CC32xx LaunchPad
- CC3235S LaunchPad (LAUNCHXL-CC3235S)
- CC3235SF LaunchPad (LAUNCHXL-CC3235SF)
- CC3220S LaunchPad (CC3220S-LAUNCHXL)
- CC3220SF LaunchPad (CC3220SF-LAUNCHXL)
- 1x Micro-USB cable (included with LaunchPad)
OR
- 1x CC31xx BoosterPack (BOOSTXL-CC3135 or CC3120-BOOST)
- 1x Advanced Emulation Kit for CC31xx BoosterPack (CC31XXEMUBOOST)
- 1x Micro-USB cable (BoosterPack)
Hardware Setup
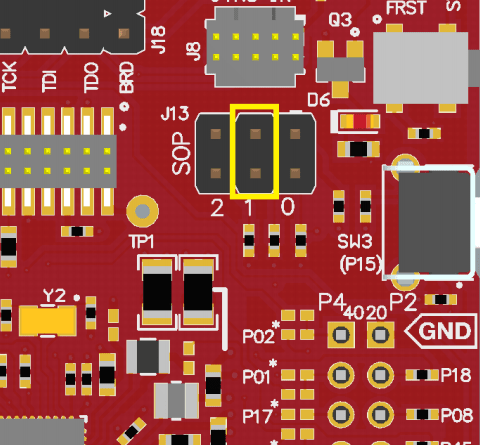
To enable flash programming on the CC32xx LaunchPad, the Sense-On-Power (SOP) jumpers on the board need to be configured correctly. The CC32xx device implements a SOP scheme to determine the device operation mode upon power up. Ensure the SOP jumpers are set to 010, as shown in the image below.
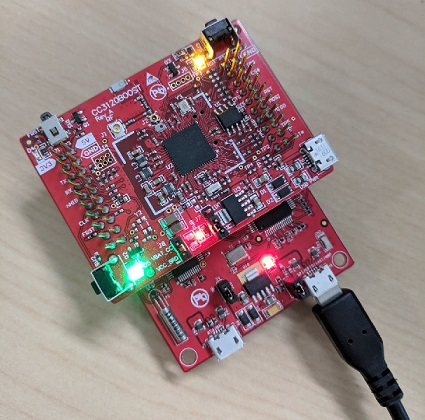
To flash the CC31xx, we need to use the CC31XXEMU device as well. Mount the CC31xx BoosterPack on top of the CC31XXEMUBOOST so the pins align, especially the white arrow with the 3V3 indication. Plug the USB cable into J6 of the CC31XXEMUBOOST. The configuration is shown below.
Launching ImageCreator from UniFlash
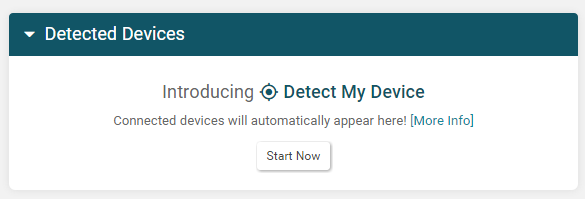
If you already use CCS Cloud and you have the TI Cloud Agent installed, you can use the Detect My Device feature which will automatically display LaunchPads that are plugged into your computer. Just click Start Now!
Alternatively, you can manually choose your device. Type "CC3" into the search bar and you'll see a number of options. Select the CC3220SF-LAUNCHXL or CC31XX / CC32XX Serial device and click Start Image Creator to launch the ImageCreator tool.


Creating a New Project
Each ImageCreator project is a workspace for creating an image file for a CC3x20 or CC3x35 device. SimpleLink Wi-Fi devices contain so much more than application code, so different projects allow users to easily develop and test different device configurations, security features, certificates, and user files.
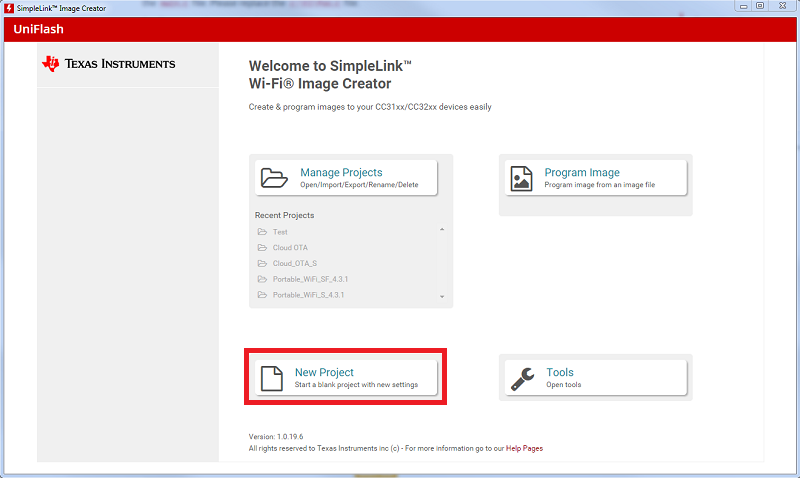
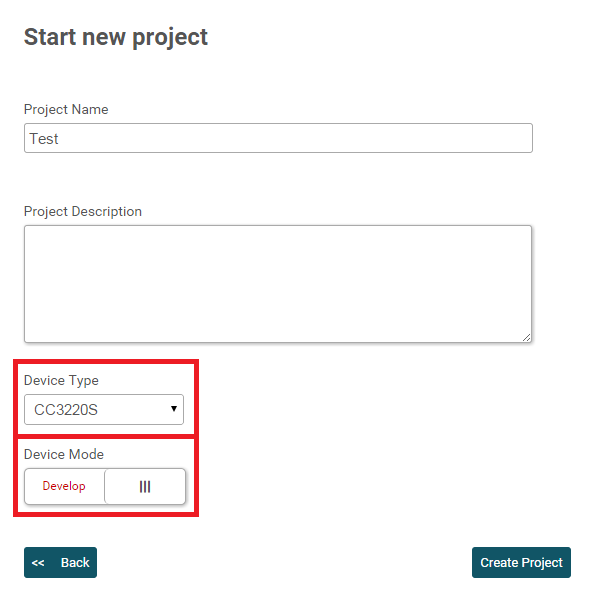
To start a new project, launch ImageCreator and select New Project from the home page.
The next screen will ask you to name the project and select a Device Type and Device Mode. Be sure you are selecting the correct device type (CC32xxS, CC32xxSF, CC3220R, or CC31xxR). If you plan to use the LaunchPad's JTAG or debug with Code Composer Studio, you will want to set the Device Mode to Develop. You can change this later. For more details on this mode, see Development vs. Production Mode.
Simple vs. Advanced View
Simple
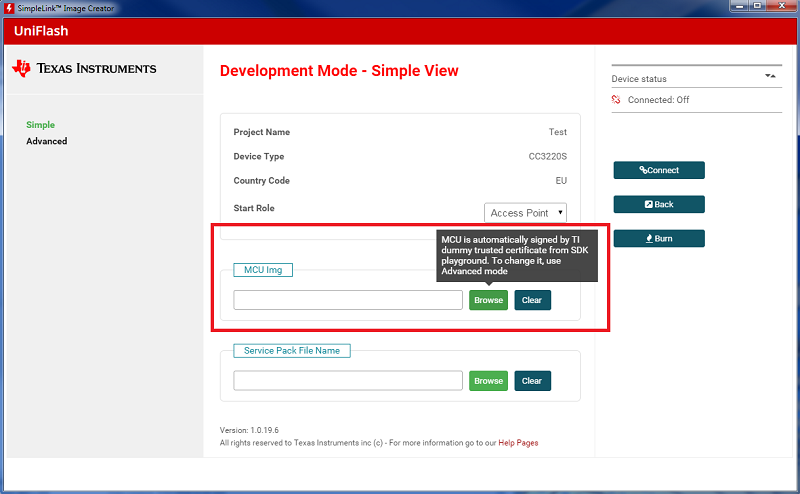
When you open up a new project in UniFlash ImageCreator, the first page you see will be the Simple view. This view provides the essentials to flash an application MCU image and a service pack to the SimpleLink Wi-Fi device to get you started in your development.
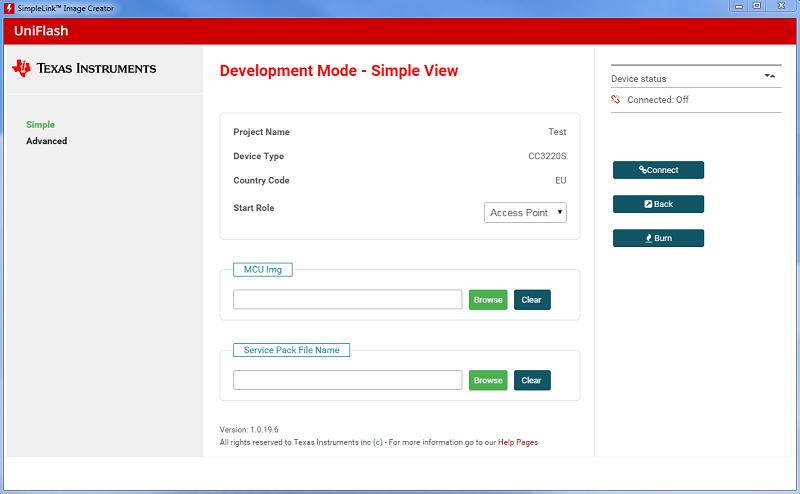
The simple view signs the MCU image with a "dummy" certificate provided in the SDK so it can boot securely on an S or SF device. For more details on our security features, see the SimpleLink Wi-Fi Built-In Securtiy Features App Note.
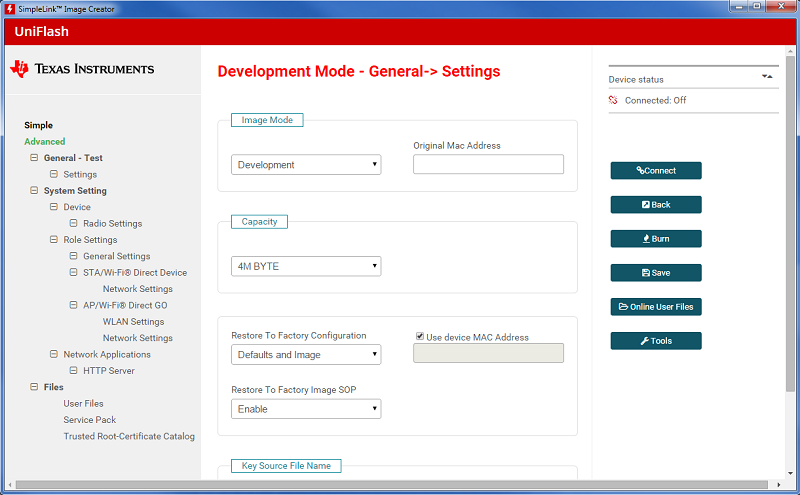
Advanced
The advanced view gives you full access to the file system, trusted root-certificate catalog, and system settings. In this view, you can add user files such as TLS certificates and change the default radio settings upon device boot.
You can switch between the simple and advanced views in the left-side menu and retain all of your project settings and files.
Adding the Latest Service Pack
The service pack is a file that contains fixes and new features for the network processor code. At a minimum the service pack is required to be programmed, and you should always use the latest released service pack. Service packs are released in each quarterly SDK in the tools/cc3xxx_tools/servicepack-cc3xxx folder.
To add a service pack to the project, click Browse and navigate to simplelink_cc32xx_sdk_x_xx_xx_xx/tools/cc32xx_tools/servicepack-cc3xxx/sp_xxxx_xxxx_xxxx.bin. Be sure you select the BIN file.
Once the service pack is added to the project image, you must program it to the device.
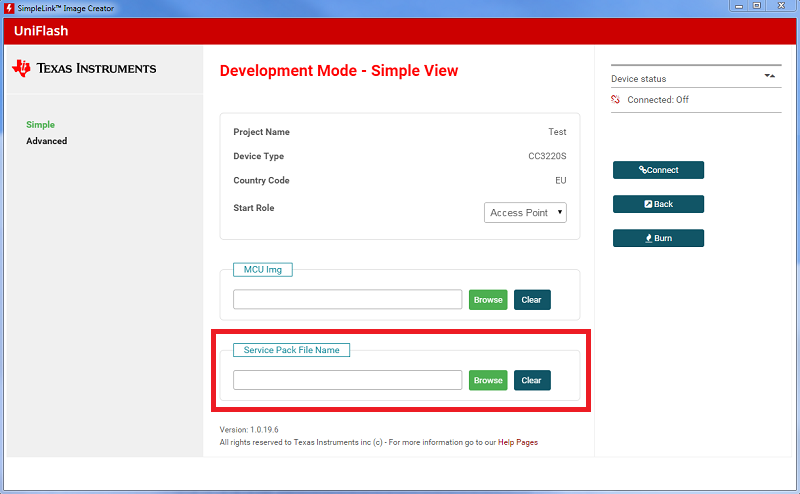
You can add the service pack from the advanced view as well by going to Files → Service Pack in the left menu.
Adding an MCU Image
The easiest way to add an application MCU image to the CC32xx LaunchPad while developing is to do it in the simple view.
Using the CC31xx?
MCU images cannot be flashed to the CC31xx BoosterPack, so you will not see the option on Uniflash to add an MCU Image. Instead, the MCU Image would be flashed to your host MCU.
The simple view signs the MCU image with a "dummy" certificate provided in the SDK so it can boot securely on an S or SF device. For more details on our security features, see the SimpleLink Wi-Fi Built-In Securtiy Features App Note.
To add an MCU image to the project, click Browse and navigate to your application BIN file. This action will sign the MCU image with the dummy_root_ca_cert_key and add the dummy_root_ca_cert to your project's user files.
Application BIN file
If you are developing with CCS, this BIN file will typically be in your CCS workspace in the project's Debug folder.
To securely sign the MCU image with your own certificate, switch to the advanced view and refer to the UniFlash ImageCreator User's Guide.
Once your MCU image is added to the project image, you must program it to the device.
Program an Image
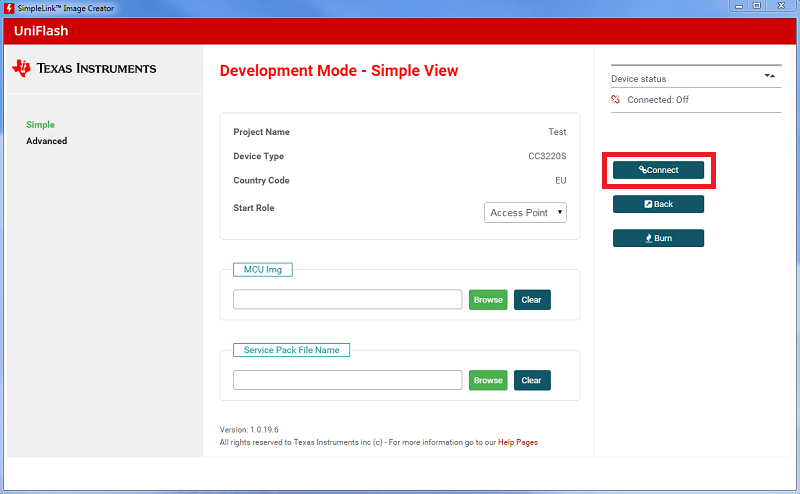
If you have the device in Development mode and you are working with a new LaunchPad, the ImageCreator tool will need to detect the LaunchPad's MAC address so it can successfully program the device. Click the Connect button on the right.
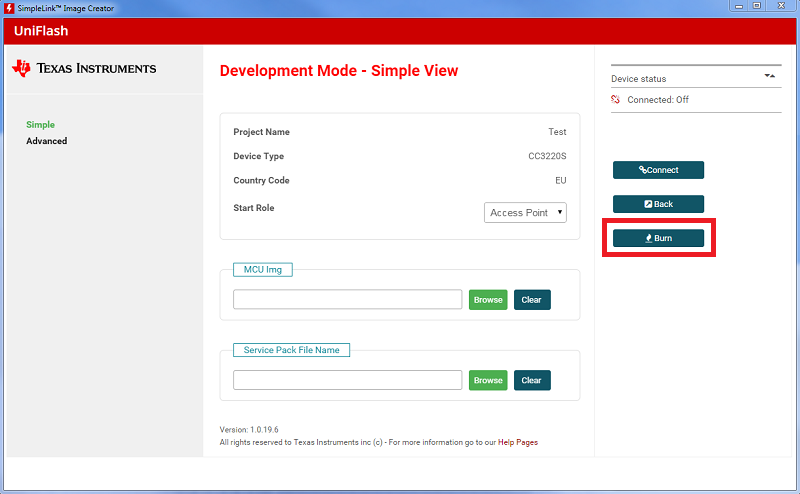
The Burn button on the right will take you to the Generate Image page where you can create and program an image to the device. Select Program Image to generate a project image containing all of your files and configuration settings and load it to the external serial flash for the CC3xxx.
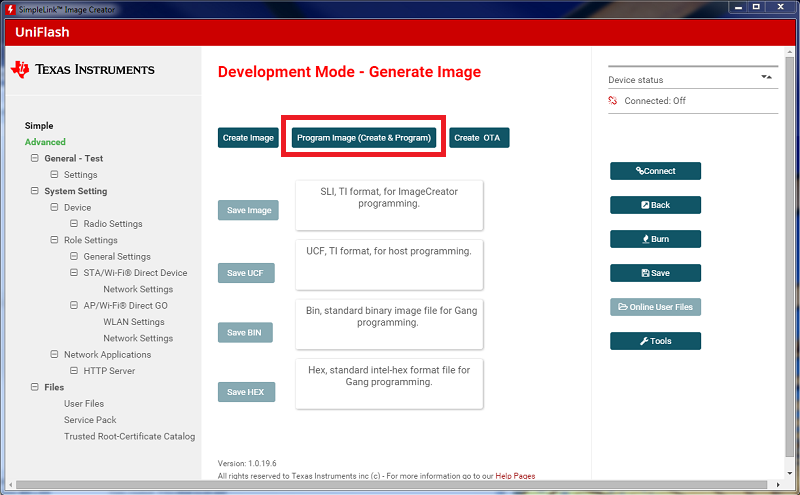
Additional options on the Generate Image page include different image formats for production methods such as embedded programming and gang programming. You can also create an OTA bundle for Over-The-Air Updates.
Importing and Opening a Project
UniFlash ImageCreator project files are provided in ZIP format.
ImageCreator project files
Do not unzip before importing, as the data inside will look like junk.
From the ImageCreator home page, select Manage Projects to open the project management view.
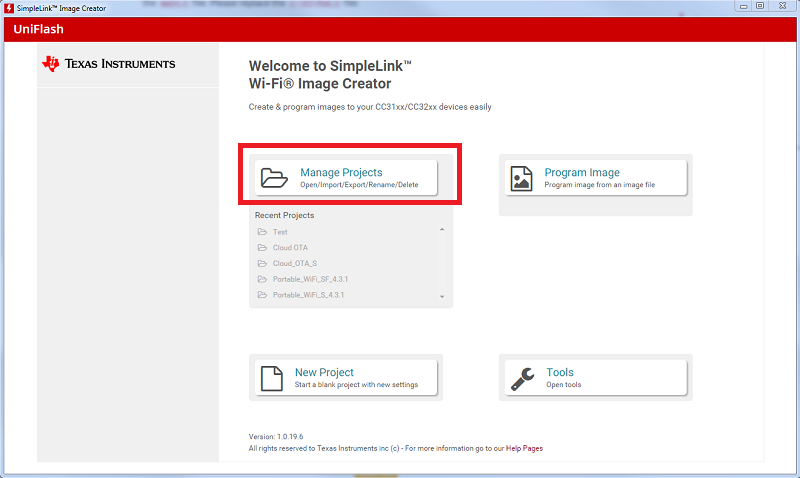
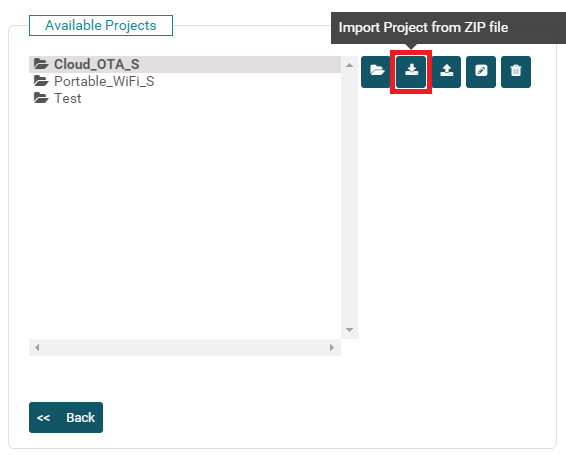
Select Import Project from ZIP file. Other options include Open Selected Project (highlighted in Available Projects list), Export Selected Project (as a ZIP file), Rename Selected Project, and Delete Selected Project.
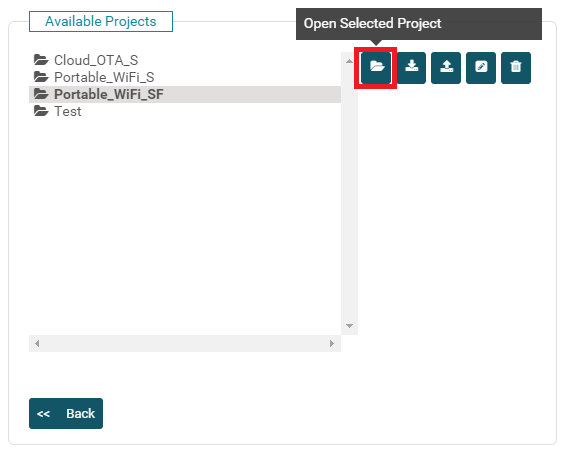
Browse to the ZIP file in your directory. Once the project is imported, make sure it is selected in the Available Projects list and choose Open Selected Project.
Development vs. Production Mode
To ensure system integrity, the SimpleLink Wi-Fi device applies an image-based programming methodology. Development mode exposes features for easier development without compromising on security. The following functionality is available:
- File-by-file access is permitted from the ImageCreator tool
- File list can be accessed from the ImageCreator tool
- JTAG interface is enabled for debugging
Production mode is appropriate for mass production and enables multiple devices to be programmed with the same image. The JTAG interface is blocked in this mode, so a CC32xx LaunchPad cannot be used with the Code Composer Studio debug tool when it is flashed with a production image.
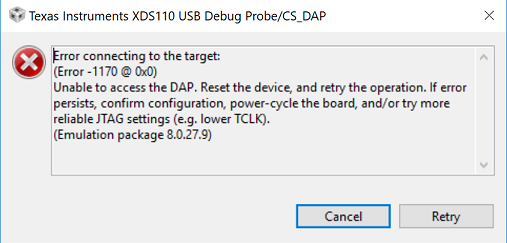
Receiving Error -1170 (Unable to access the DAP) during debugging?
To change device modes in an existing project, switch to the advanced view and navigate to General → Settings. There is a drop down menu under Image Mode. You will then have to program the image to your device.

For more details on our security features, refer to the SimpleLink Wi-Fi Built-In Securtiy Features App Note.
Adding a User File
To add a user file like a TLS certificate, switch to the advanced view and navigate to Files → User Files.
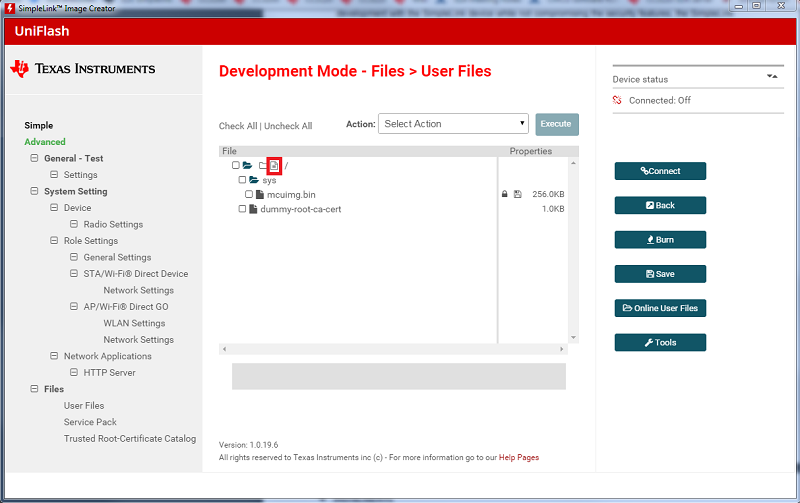
If you have added an MCU image to your project, you will see some items in the file system already. Your MCU image will be renamed to mcuimg.bin and will always be in the sys folder. When you load an MCU image in the simple view, your image is signed with a dummy root CA certificate key and a dummy root CA certificate (dummy-root-ca-cert) is added to your user files.
To add an additional user file, click the file icon at the top of the file list view.
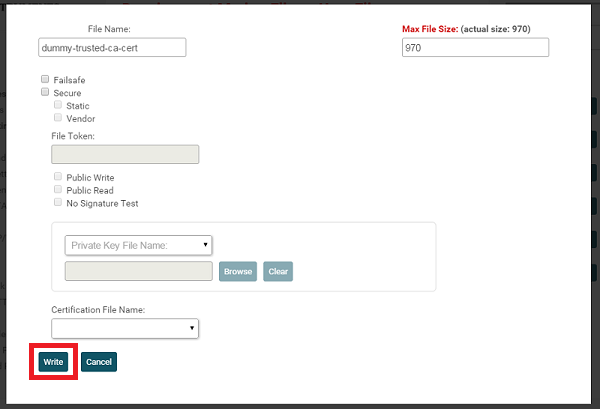
Once you select your file, you'll see this window that gives you additional security options to protect this file. For more details on each of the flags, please refer to the UniFlash ImageCreator User's Guide. For more details on all features of the secure file system, please refer to the CC3x20, CC3x35 Network Processor Programmer's Guide.
Since we are adding a dummy certificate here which is publicly available, we can continue without security considerations by selecting Write.
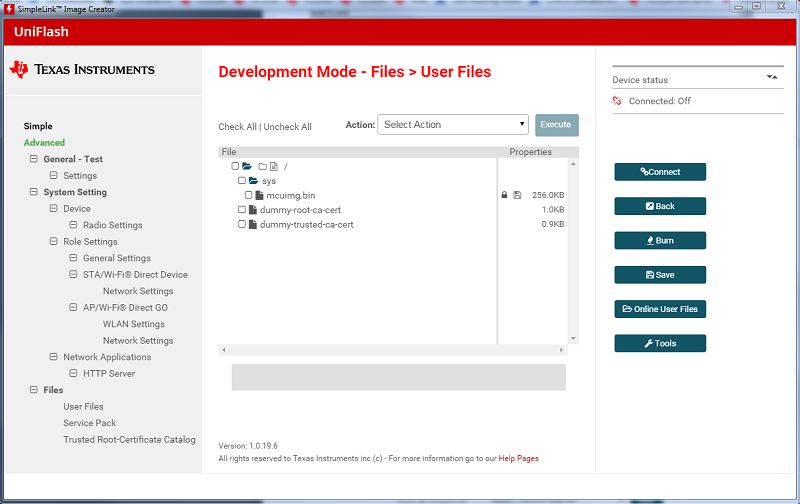
You will see the file added to the file view. Once all of your files are added to the project image, you must program it to the device.
Adding the entire "dummy" certificate chain
Some SimpleLink Academy labs and SDK examples will ask the user to flash the entire "dummy" certificate chain to the LaunchPad. This means that the user must add the dummy-trusted-cert, dummy-trusted-ca-cert and dummy-root-ca-cert from the certificate playground provided in the SDK for development. These certificate files can be found in simplelink_cc32xx_sdk_x_xx_xx_xx/tools/cc32xx_tools/certificate-playground.
For a detailed explanation on what is a certificate chain and other certificate questions, please see the SimpleLink Wi-Fi Certificates Handling User's Guide.
Changing the Trusted Root-Certificate Catalog
The trusted root-certificate catalog is used to verify the root CA certificates that are trusted by the device. The catalog is mandatory for secure boot on CC32xxS and CC32xxSF devices, but it is not required for other secure features such as TLS/SSL.
For a detailed explanation on the trusted root-certificate catalog and other certificate questions, please see the SimpleLink Wi-Fi Certificates Handling User's Guide.
To add a certificate catalog, switch to the advanced view and navigate to Files → Trusted Root-Certificate Catalog. Uncheck the Use default Trusted Root-Certificate Catalog option.
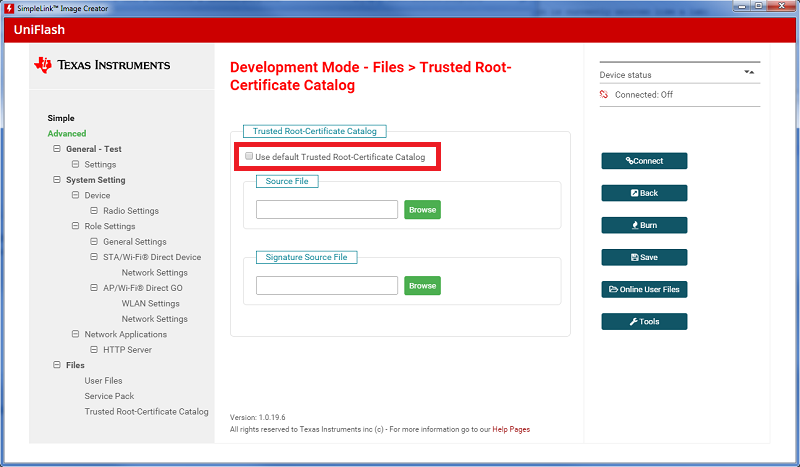
Add the data list in LST format by selecting Browse under Source File. The Signature Source File will be a signature in BIN format signed by TI's private key.
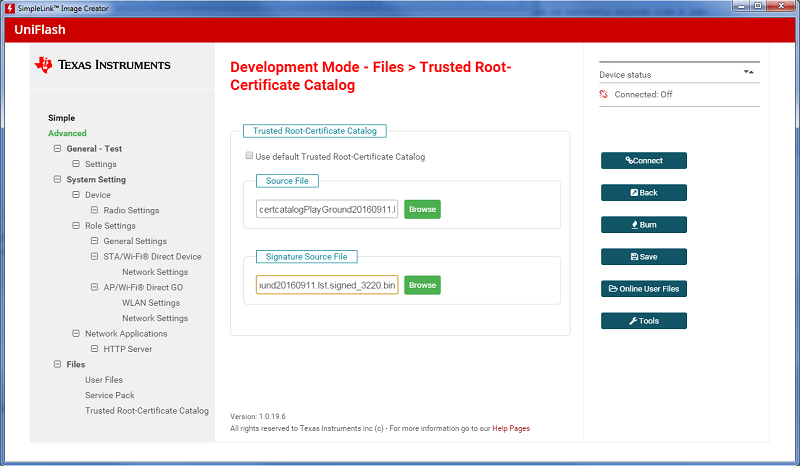
Adding the playground Trusted Root-Certificate Catalog
Some SimpleLink Academy labs and SDK examples will ask the user to add the playground trusted root-certificate catalog to the LaunchPad. This means that the user must add the certcatalogPlayGroundxxxxxxxx.lst and certcatalogPlayGroundxxxxxxxx.lst.signed_32xx.bin from the certificate playground provided in the SDK for development. These files can be found in simplelink_cc32xx_sdk_x_xx_xx_xx/tools/cc32xx_tools/certificate-playground.
Further Reading
- UniFlash ImageCreator User's Guide
- SimpleLink Wi-Fi Built-In Security Features App Note
- SimpleLink Wi-Fi Certificates Handling User's Guide
- CC3x20, CC3x35 Network Processor Programmer's Guide
Technical support
For any questions you might have, please search on the TI SimpleLink Wi-Fi E2E Forum.
This work is licensed under a Creative Commons Attribution-NonCommercial-NoDerivatives 4.0 International License.